Managing Video Results | ||||||
|
| |||||
Associate the Video Result to the Machining Operation
You can associate the video result to a Machining Operation.
Right-click the Machining Operation in the Manufacturing Program then select Tool Path Replay
 .
See About NC Manufacturing Verification.
.
See About NC Manufacturing Verification.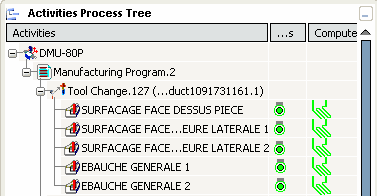
- Select
Video from Last Saved Result
 in the Tool Path Replay dialog box.
 A material removal is displayed starting from the previous saved result.
- Select
Video from Last Intermediate Stock
 in the Tool Path Replay dialog box.
Those commands are also available from the contextual menu of the Machining Operation.
Note: If the intermediate stock option is not activated in the Part Operation (see Creating a Part Operation), if the intermediate stock is not computed in the Machining Operation, and if the intermediate stock is not up-to-date (see About Intermediate Stock), the command Run Video from Last Intermediate Stock is not available.
- Select
Video from Last Saved Result
Select Associate Video Result to Machining Operation
 in Tool Path Replay dialog box.
- A message informs you that the video result file is stored. It contains only geometrical information and additional information like collisions, previous materials, or previous Machining Operation names is not provided.
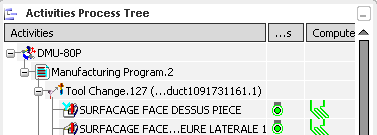
- In the Activities Process Tree, a blue check identifies Machining Operations with an associated video result.
![]()
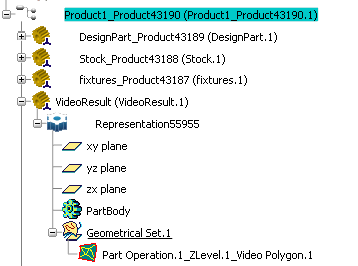
Create the Video Result in a 3D Part
You can create a video result in a 3D Part.
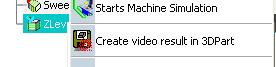
Once a video result has been associated to the Machining Operation, right-click the Machining Operation and select Create video result in 3DPart in the contextual menu.
The Create Video Result dialog box is displayed.
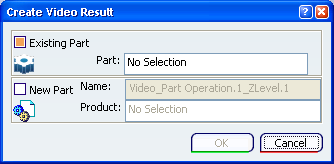
 By default,
the Existing Part check box is selected.
By default,
the Existing Part check box is selected.Select the destination of the video result:
- Existing part: select a representation under an existing 3D Part and click OK.
The video result is created as a polygon (mesh) under the selected 3D Part.
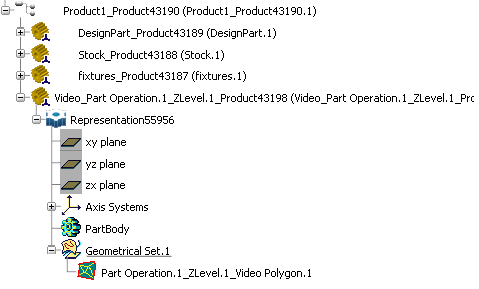
- or select the New Part check box and select the product under which you want to create the 3D Part. Click OK.
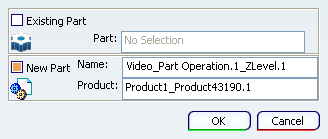
- A default name is proposed for the part (Video_Part Operation.1_xxx). It is editable.
- The dialog box is updated with the name of the insertion product.
- After OK, the 3D Part is created.
- The video result is created under the 3D Part , together with the 3 main planes and an axis system corresponding to the machining axis system of the original Part Operation.
- Existing part: select a representation under an existing 3D Part and click OK.
You can now use the video result of the original Part Operation (e.g. Part Operation.1) as the input stock for another Part Operation (e.g. Part Operation.2) in a new PPR Context.
Note:
- If the Part Operation.1 is modified, the video result must be recomputed and saved again into the same 3D Part to be referenced automatically by the Part Operation.2. An update may be necessary.
- The intermediate stock is not created in the 3D Part. If you need to create it, compute a video from the intermediate stock, associate the video result to the Machining Operation and create the video result in a 3D Part as explained above.
![]()
Save Video Result with All Information
You can save Video result with all extra information such as collisions, cut information, material etc.
Right-click a Machining Operation and select
 .
.Right-click a Machining Operation and select
This runs a Video from last saved result on a Machining Operation.
Running a Video from last saved result on a Machining Operation load the saved result with material information. If you pick a previous machined area, it gives the name of previous Machining Operation that machined this area. It is not possible to automatically reload collision information.
Right-click a Machining Operation and select Load Simulation result in the contextual menu to check a previous Video session.

This command is available only on a Machining Operation where a Video result is saved.
Click Load Simulation result command.
The Video window appears with Analysis commands.
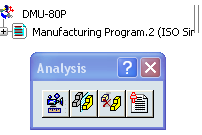
The available Analysis commands are:
- Video
Measure
 : See Using Video Measure Analysis
 - Analyze
 : See Comparing Machined Stock Part and Design Part
 - Remove
Chunks
 : See Removing Detached Material in a Video Simulation
 - Video Collision
Report
 : See Detecting Collisions in Video Simulations
- Video
Measure