Simulating Material Removal in Video Mode | |||||||
|
| ||||||
In this example, the part is displayed held in place by fixtures. The stock is in hide mode.
Right-click the Machining Operation in the Manufacturing Program (in our example Facing.1), then select Tool Path Replay .
SeeAbout NC Manufacturing Verification.
.
SeeAbout NC Manufacturing Verification. The Tool Path Replay dialog box appears.
There are four video simulation modes:
-
 Full Video: performs a video simulation for the complete
Manufacturing Program or Part Operation (depending on the setting, see Photo/Video.)
Full Video: performs a video simulation for the complete
Manufacturing Program or Part Operation (depending on the setting, see Photo/Video.)
-
 Video from Last Saved Result:
performs a video simulation from the saved result of the previous video
simulation.
Video from Last Saved Result:
performs a video simulation from the saved result of the previous video
simulation.
-
 Mixed Photo/Video: performs
a photo simulation up to the Machining Operation just before
the selected Machining Operation, then performs a video simulation on the selected Machining Operation.
Mixed Photo/Video: performs
a photo simulation up to the Machining Operation just before
the selected Machining Operation, then performs a video simulation on the selected Machining Operation.  Video from Last Intermediate Stock: performs a video simulation starting from the input intermediate stock of the Machining Operation.
-
Select Full Video
.
The PPR Editor window switches to a window entitled Video.
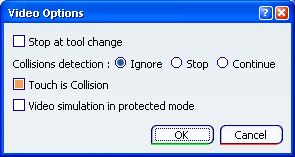
The Video Options dialog box is displayed.
Click
 to run the material removal simulation
of the Machining Operation.
to run the material removal simulation
of the Machining Operation.
Notes: If the replay mode is set to:
 , i.e. point to point, the
number of points value specifies
the number of points to be run through
at each step of the replay.
, i.e. point to point, the
number of points value specifies
the number of points to be run through
at each step of the replay.  , i.e. continuous, the slider
position is taken into account for
adjusting the speed of the simulation.
For improved performance, intermediate
graphics are not updated when the
slider is used to increase simulation
speed.
, i.e. continuous, the slider
position is taken into account for
adjusting the speed of the simulation.
For improved performance, intermediate
graphics are not updated when the
slider is used to increase simulation
speed.- See Replaying the Tool Path for more information on replay modes.
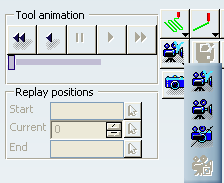
Control the material simulation video using the following control buttons and keyboard shortcuts:
 or F5: positions the tool at the start of the simulation.
 or F6: runs the simulation backward.
 or F4: pauses the simulation
-
or F7: runs the simulation forward.
 or F8: runs forward up to the end of simulation.
 Note:
- No intermediate graphics update is made to save on rendering time.
- A progress indicator shows the computation progression and the final machined stock appears.
Right-click another Machining Operation (in our example, Pocketing.2), then select Tool Path Replay
.- Select Full Video
to run the video from the start of the Manufacturing Program up to
the selected Machining Operation.
The figure below shows the state of the material removal simulation at the end of the Pocketing.2 operation.
- Select Full Video
Repeat the steps described above to run the video from the start of the Manufacturing Program up to the last Machining Operation (in our example, Pocketing.6).
The figure below shows the state of the material removal simulation at the end of the Pocketing.6 operation.

