Go to
Tools > Options > Mechanical > Drafting > Administration tab, and clear the Disable Generative View Style definition on layout views check box.
This activates the generative view style functionality.
Click New View  in the Layout toolbar.
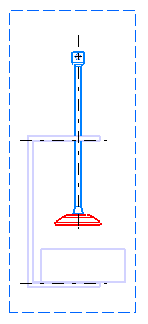
The preview of the 2D view frame along with the robot is displayed in the sheet. Depending on a possible selection, the robot lets you change either the primary view type (no selection), or the view box orientation.
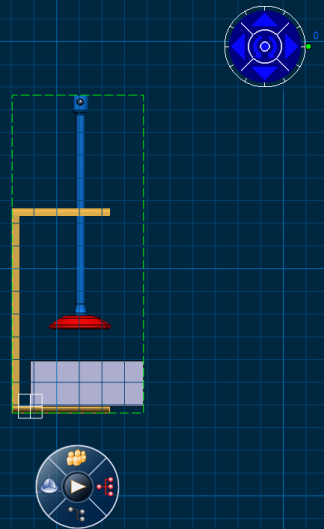
Click on the sheet to position the new view.
The View Creation dialog box appears.
Refer to View Creation Dialog Box for more information.
In the Style list, select the generative view style of your choice or select (No Generative View Style) if you do not want to apply a generative view style.
Note:
- When you create a view by applying a generative view style, the selected style gets embedded in the layout. However, if the generative view style file that was set on a view is updated, the style embedded in the view itself is not updated, unless you do so specifically.
- You can update the embedded version of the generative view style with the newer version by clicking Update in the Generative View Styles dialog box available from Tools > Generative View Styles. Refer to Generative View Styles Dialog Box for more information.
- If you want to disassociate the current embedded generative view style from the view, you can right-click a view and select (No Generative View Style) from Properties. Refer to Generation Tab for more information.
The selected generative view style is applied to the view.
Click OK.
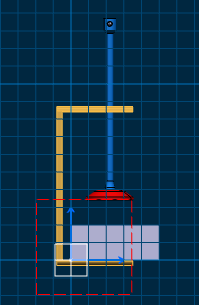
A primary view is created with the selected generative view style applied to it. The generative view style will be taken into account when generating a drawing (or a View from 3D in a drawing), from the layout view. The view displays a blue axis in a red frame. Additionally, the FRONT item is added to the specification tree.
Optional: Create a view from 3D. Refer to Creating a View from 3D for more information.
The view is created in the drafting using the selected generative view style. In our example, Color option is set to Yes in Tools > Standards > generativeparameters > [standard file] > Drafting > ViewDressup > 3DInheritance > Solid > Color. Note that you may obtain a different result. This result depends on the parameters defined in the generative view style you selected.