Creating and Using Prismatic Machining Areas | |||||
|
| ||||
Activate the Manufacturing Program and click Prismatic Machining Area
 in the Prismatic Machining Operations toolbar.
The Prismatic Machining Area dialog box includes a sensitive icon to help you specify the geometry. Areas of the icon are colored red indicating that this geometry is required.
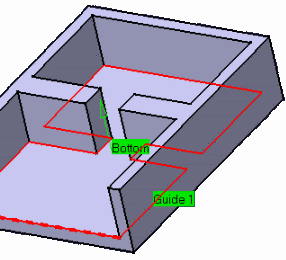
Click the red Bottom in the sensitive icon then select the pocket bottom in the authoring window.
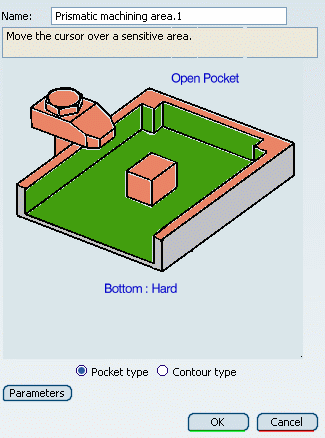
The pocket boundary (Guide.1) is automatically deduced from the pocket bottom.
Make a machining activity current in the Activities Process Tree, then click Pocketing
 in the Prismatic Machining Operations toolbar.
- Go to the Tool tab
 to select a tool, in the Pocketing dialog box.
 - Go to the Macros
tab
 to specify a Retract
macro with a linear retract path of 50mm.
to specify a Retract
macro with a linear retract path of 50mm. - Simulate the tool path in photo simulation mode to check the Pocketing operation.
See Simulating Material Removal in Photo Mode
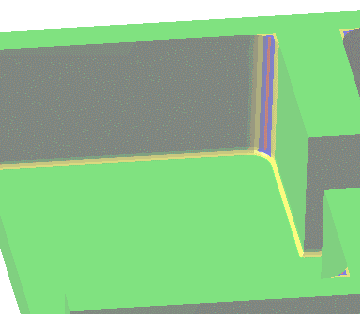
The pocketing operation leaves some unmachined material in the corners.
- Go to the Tool tab
Click Profile Contouring
 in the Prismatic Machining Operations toolbar.
- Select the Macros
tab to specify an Approach
macro with a linear approach path of 50mm.
- Simulate the tool path in photo simulation mode to check the Profile Contouring operation.
- Select the Macros
tab
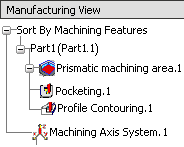
Click Manufacturing View
 to display the Manufacturing View.
 In the contextual menu, select the Sort by Machining Features item to see how the Prismatic machining area is referenced by the Pocketing and Profile Contouring operations.
Note:
- The tool entry direction for a Prismatic machining area is the normal to the selected bottom. When the same Prismatic machining area is used in another operation, the tool axis takes precedence and the computation is done based on the tool axis.
- In addition to Pocketing and Profile Contouring operations, Prismatic Machining Areas can also be used for Creating a Prismatic Rework Area for Corners and Channels.