Creating a Profile Contouring Operation: By Flank Contouring | |||||
|
| ||||
Activate the Manufacturing Program and click Profile Contouring
 in the Prismatic Machining Operations toolbar.
A Profile Contouring entity is added to the Manufacturing Program.
The Profile Contouring dialog box appears directly at the Geometry tab
 .
This tab includes a sensitive icon to
help you specify the
geometry.
.
This tab includes a sensitive icon to
help you specify the
geometry.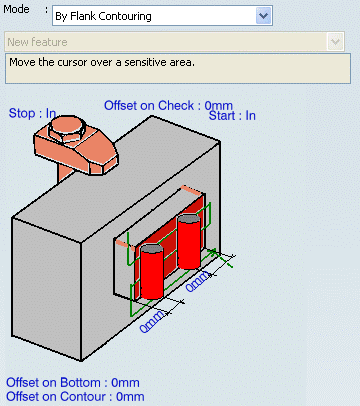
The guiding element in the icon is colored red indicating that this geometry is required for defining the operation. All other geometry is optional.
- Set the Contouring mode to By Flank Contouring.
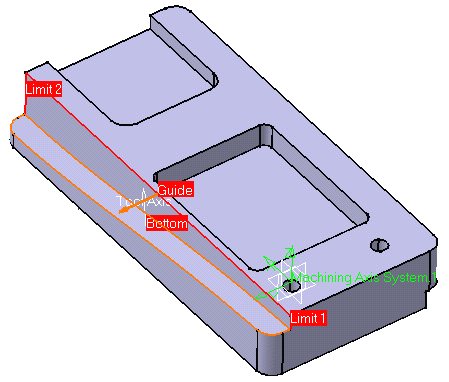
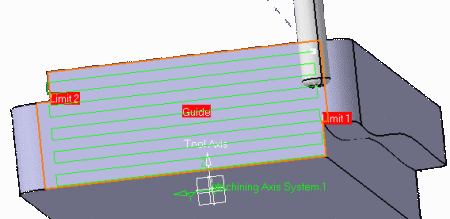
- Click the guiding element in the icon, then select the vertical face of the part in the authoring window.
- Click the first relimiting element in the icon, then select a vertical edge at one end of the part in the authoring window.
- Click the second relimiting element in the icon, then select the vertical edge at the other end of the part in the authoring window.
- Set offsets on the geometric elements, if needed.
The guide and limit elements of the icon are now colored green indicating that this geometry is defined. These are also indicated on the part.
Note: A Collision Checking capability is available in the Geometry tab, which allows collision checking between the tool and guide elements during macro motions.
- Choose the desired Tool path style.
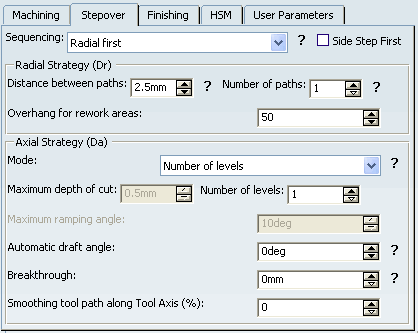
- Set the machining criteria such as machining tolerance, stepover conditions, finishing, HSM, and User Parameters.
Go to the Tool tab
 to select a tool.
Select the Feeds and Speeds tab
 to specify the feedrates
and spindle speeds for the operation.
to specify the feedrates
and spindle speeds for the operation.Select the Macro tab
 ,
you can add approach and retract motions to the operation.
,
you can add approach and retract motions to the operation.
Click Tool Path Replay
 to check the validity of the operation.
- The tool path is computed.
- A progress indicator is displayed.
- You can cancel the tool path computation at any moment before 100% completion.
 .
.