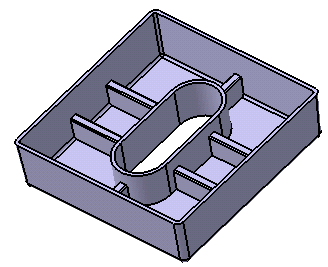
Creating a Rib | |||||||
|
| ||||||
Click Rib
 in the Functional Features toolbar.
 The Rib dialog box appears.
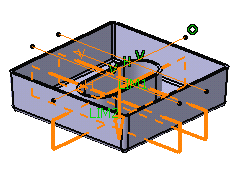
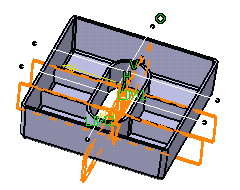
Select a sketch to specify a closed profile.
Tip: If no profile is defined, clicking Sketcher  enables you to sketch the profile you need.
The prism is the default shape. Just click Sweep
 if you want to change. For the purposes of our scenario, keep the default
option.
if you want to change. For the purposes of our scenario, keep the default
option.Set the parameters and options as follows to define the shape as explained in Prism.
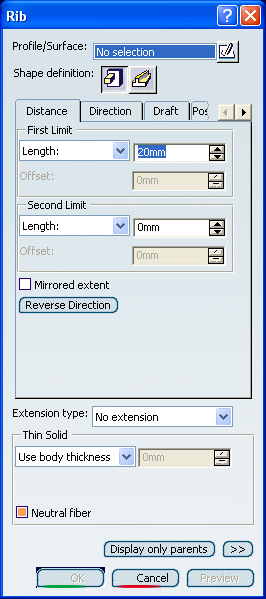
In the Distance tab:
First Limit: Length=20mm
Second Limit: Length=-50mm
To define limits, instead of using the Length option, you can set the:
-
To shell option. This capability extends the rib to a shellable volume in the active body, in the opposite direction of the height. The extension of the rib profile must fit inside the boundaries of the shellable volume. Otherwise, no extension will occur.
-
To Plane/Surface option. The plane or surface you then select trims the rib.
- To Parting Element: the parting element specified in the draft properties is used to set this limit. For this, you need to define Draft behavior in the Draft tab.
Note: It is not possible to select this option for defining First length as well as Second length at the same time.
- To Neutral Element: the neutral element specified in the draft properties is used set this limit.
Note: You cannot select this option for defining First length as well as Second length at the same time.
-
To define the extension type you want, you can set one of the options available from the Extension type drop down list. For the purpose of our scenario, set the No extension option.
No extension confines the rib to be created only within the walls of the shelled volume, even if the profile is outside of the walls of the volume.
Click OK to confirm and create the rib.
Rib.X is added to the specification tree in the Solid Functional Set.X node.