Modifying Stickers | |||||||
|
| ||||||
Modify the Sticker Texture Image and Transparency
You can modify the sticker texture image and transparency
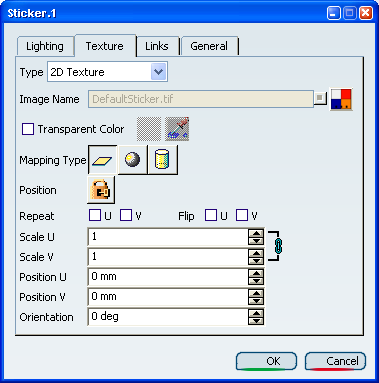
Right-click the sticker in the specification tree then select Sticker object > Definition.
You can also double-click the sticker in the specification tree to open the Sticker dialog box which lets you modify the sticker properties.
Click
 to open the Object Selection dialog box.
Navigate to the image you wish to apply then click OK. For more information about image formats refer to About Image Formats.
The name and the graphical representation of the chosen image are displayed in the Image Name box:
You can rename your image by clicking Rename the image
 next to the image name.
Whatever image format you choose, you can select the Use Transparent Color check box then click
 to
open the transparency viewer (the default transparent color is Black).
The Pick Transparent Color dialog box opens:
to
open the transparency viewer (the default transparent color is Black).
The Pick Transparent Color dialog box opens:
Important: The Transparent Color results from a comparison between pure color components. There is no tolerance, which implies that some aliasing artifacts may appear. - You can zoom the sticker image to be used in the
Pick Transparent Color dialog box. This is especially
useful for choosing the pixel to be used as a color reference
for transparency:
To do so, press and hold down the middle mouse button, then click the left (or right) mouse button and drag (still holding the middle mouse button down) upwards to zoom in or downwards to zoom out. The image below has been zoomed out:
- To reframe automatically the image, click Fit All
In
 .
.
- You can zoom the sticker image to be used in the
Pick Transparent Color dialog box. This is especially
useful for choosing the pixel to be used as a color reference
for transparency:
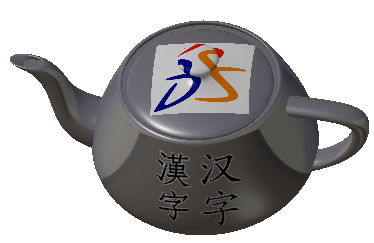
Click OK to validate your new parameters.
The new sticker properties are applied onto the object:
![]()
Modify the Lighting Parameters
You can modify the lighting parameters.
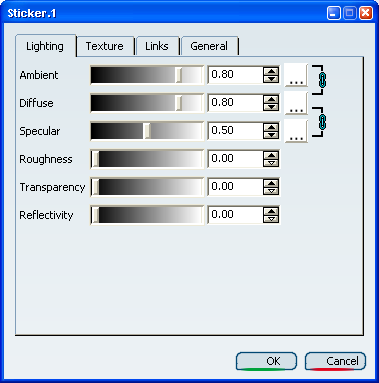
Click
 then choose the color to be used for the material texture. For more
information on the Color chooser and how to apply a color
refer to Applying a Color Using the Color Chooser.
then choose the color to be used for the material texture. For more
information on the Color chooser and how to apply a color
refer to Applying a Color Using the Color Chooser.You can click
 to unlink the colors. You
will then be able to choose different colors and adjust them independently.
The icon changes to
to unlink the colors. You
will then be able to choose different colors and adjust them independently.
The icon changes to  .
.- If you click
after having
changed the colors, the Color chooser dialog
box opens to prompt you to choose either one or the other
color:
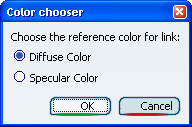
- Click OK to validate your choice.
- If you click
![]()
Apply a Sticker to Other Geometries
This tab allows to handle the list of geometries on which the sticker is applied.
Important:
|
 .
. .
. .
.