Using the Materials Palette | ||||||||
|
| |||||||
Click Materials Palette
 .
.The Materials palette appears. The materials palette comprises three components:
- Filter Specification Tree that allows you to filter materials. (Left zone)
- Edit Applied Material Balloon command that allows you to access a dedicated balloon toolbar to edit applied materials. The balloon toolbar appears when you click Edit Applied Material Balloon and select geometry from either the model geometry or the specification tree.
- Palette View that displays the materials (right zone). In Details View
 any material attribute added as a filter appears in a column. See Filtering Materials in the Palette for more information.

If the material name is not entirely displayed, you can display it by moving the cursor over the material: a tooltip appears giving you the full material name.
Important: - The content of the Palette view is different depending on the settings you specified (). If no material in the database corresponds to the options you defined in the settings, the Materials palette is empty and a message appears. See Materials Palette.
- The names in the Materials palette correspond to the display names specified in the PLM attributes for each material; this may not be the same name that was specified when the material was created. See Settings Customization Guide: PLM Access Settings: PLM Attributes.
Optional: Modify the display mode of the palette content.
- To display the palette content with thumbnails, click Thumbnail View
 .
. - To display the palette content in tiled view, click Tiles View
 .
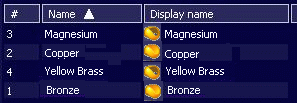
. - To display the palette content in detailed view, click Details View .
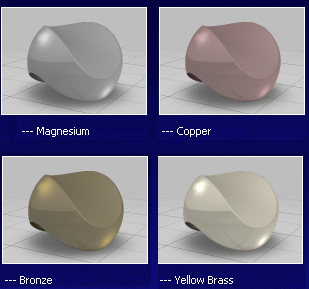
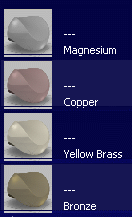
- Thumbnail view
- Tiles view
- Details view
- To display the palette content with thumbnails, click Thumbnail View
To undock the palette, click
 .
.You can move and resize the palette.
To dock the palette, click
 .
.You can resize the palette, but you cannot move it.
To modify the content of the Materials palette, use the Search box of the Bar.
The content of the palette is replaced by the result of your search criteria.
To restore the full content of the palette, click Materials Palette
.To apply a material to a support:
- Select a geometry, a 3D shape, or a product from either the model geometry or the
specification tree.
The Material balloon toolbar appears. For more information about the Material balloon toolbar, see About the Material Balloon Toolbar.
- To change a support, click Apply Up
 to apply the material to the upper object in the selection path or click Apply Down
  to apply the material to the lower object in the selection path. For more information about the selection path, see About the Material Balloon Toolbar.
 Warning: - The Apply Up and Apply Down options available in the Material balloon toolbar depend on the current support selection.
- You can apply a covering material to a product reference, a product instance, and a representation instance.
- To remove the last material you applied to a support, click Undo
 .
.The material is automatically removed from the last support selected for application.
- To close the balloon toolbar, click
 .
.
- Select a geometry, a 3D shape, or a product from either the model geometry or the
specification tree.
To edit an applied material:
- Click Edit Applied Material Balloon.
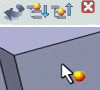
The cursor changes to indicate the material edit mode is active
 . For more information, see About the Edit Applied Material Balloon Toolbar.
 - Click Delete
 to remove the applied material.
 - Click Undo to reverse the delete operation.
The material is automatically reapplied to the last selected support.
- Click Reapply to apply the selected applied material to other supports.
The Materials balloon toolbar appears and replaces the Edit Applied Material balloon toolbar. The cursor changes to indicate the material application mode is active
 .
. - Click Close .
- Click Edit Applied Material Balloon.
When you are done applying and editing materials, click
 to close the Materials palette.
