Applying a Covering Material | ||||||
|
| |||||
Click Apply Covering Material
 .
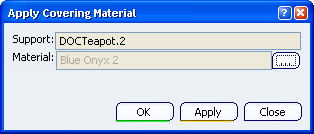
.The Apply Covering Material dialog box appears.
Click
 to select the material of your choice.
The PLM Material Chooser appears. Two tabs are available:
- From Session: select from materials already loaded in your session.
- From Search: select from all materials stored in the PLM database.
To display a list of available materials, use one of the following procedures:
- On the From Session tab, click Retrieve loaded data.
- On the From Search tab, enter a substring of the desired material's PLM identifier and click Search; alternatively, you can click Advanced Search and enter search criteria in the Search Criteria dialog box.
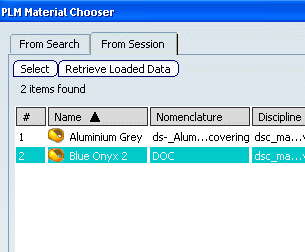
Select a covering material (e.g., Blue Onyx 2) from the list, and click OK.
Covering materials are identified in the PLM Material Chooser by the
 icon.
icon.The Apply Covering Material dialog box is updated accordingly.
Up to three covering materials can be applied to a single support. For more information about priority rules for multiple covering materials, see Material Application Supports and Context.