Adjusting Light Source Parameters | ||||||||
|
| |||||||
![]()
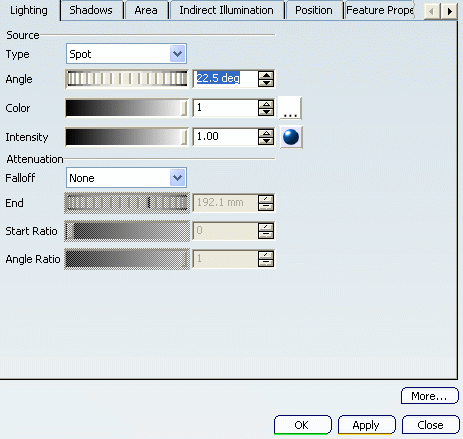
Modifying the Lighting Parameters
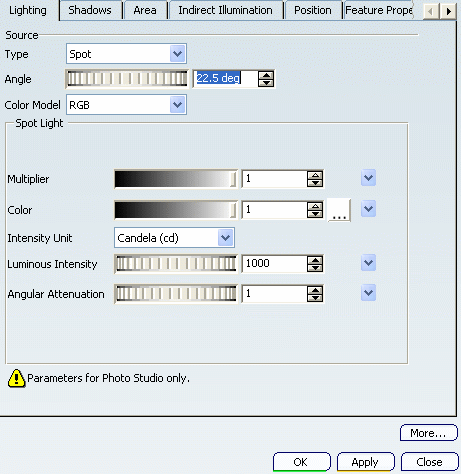
You can modify the lighting parameters.
Use the Color slider to modify the color intensity, then click
 if you want to choose another color (the default color is white).
For more detailed information, refer to Applying a Color Using the Color Chooser.
Click
 to define the intensity more precisely.
For more detailed information refer to More about Adjusting Light Source Parameters.
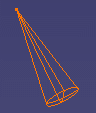
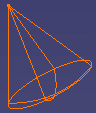
Use the Angle slider to modify the source angle. The source angle defines the half-angle of the cone, that is the angle between the axis of revolution and the cone edge (for spot light sources only).
The angle is a value between 0 deg and 90 deg. This means that a value of 90 deg would generate a light source equivalent to a punctual light source.
![]()
Modifying the Lighting Parameters
You can modify the lighting parameters.
Use the Angle slider to modify the source angle. The source angle defines the half-angle of the cone, that is the angle between the axis of revolution and the cone edge (for spot light sources only).
The angle is a value between 0 deg and 90 deg. This means that a value of 90 deg would generate a light source equivalent to a punctual light source.
Choose the color model between RGB and Temperature.
If you choose RGB, use the Color slider to modify the color intensity, then click
if you want to choose another color (the default color is white).For more detailed information, refer to Applying a Color Using the Color Chooser.
If you choose the Temperature option, use the Temperature slider to modify the temperature.
![]()
Modifying the Light Source Position
You can modify the light source position.
Select the Position tab to define the light source anchoring point and the point to which the source is directed, respectively in the Origin and Target areas.
You can define this position in millimeters along the X, Y and Z axes.
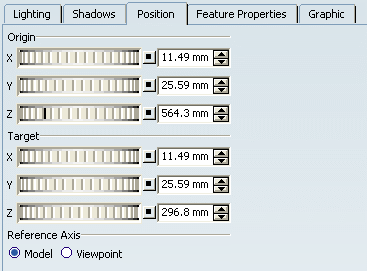
Tip: Note that you can click the Reset value  button at anytime to reset the light source to the default
position.
button at anytime to reset the light source to the default
position.The Reference Axis area lets you define the light source position relative to the Model axis or to the Viewpoint according to the option you select:
- Model
By default, any light source you create is positioned relative to the model and thus, moving the viewpoint moves the light source along the model.
- Viewpoint
Attaching a light source to the viewpoint means that moving the viewpoint only moves the model; the light source keeps the same position in the window.
When a light source is attached to the viewpoint, it is identified by an anchor symbol in the specification tree as shown below for Light.1:

Tip: You can also attach a light source to the viewpoint by right-clicking it in the specification then selecting Attach to View. Inversely, once a light source is attached to the viewpoint, you can re-attach it to the model by clearing Attach to View. - Model