More about Adjusting Light Source Parameters | ||||
|
| |||
Light Intensity
The intensity of a light source is the maximal lightness value of three colors (ambient, diffuse and specular).
The light color will be computed by multiplying the Red, Green and Blue values by the intensity value. Therefore, this parameter allows you to adjust the luminosity of the light source, while preserving its chrominance ("color") component.
You can enter values comprised between 0 and 4: the higher the value, the more saturated (i.e. the whiter) the light. More precisely, as soon as the intensity value exceeds 1, the color starts saturating.
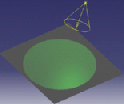
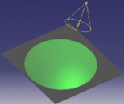
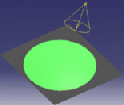
Here are two examples comparing 2 different sets of RGB values with 3 different intensities.
In the first example, all color components (R, G and B) are multiplied by intensity:
 |
 |
 |
| R,G,B = 10,100,10 Intensity = 0.5 Result = 5,50,5 |
R,G,B = 10,100,10 Intensity = 1 Result = 10,100,10 |
R,G,B = 10,100,10 Intensity = 3 Result = 30,255,30 |
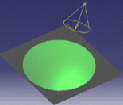
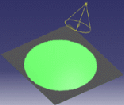
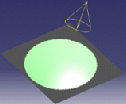
In this second example, when the intensity is greater than 1, R and B are the only components to be multiplied since G is already saturated:
 |
 |
 |
|
R,G,B = 40,255,40 Intensity = 0.5 Result = 20,128,20 |
R,G,B = 40,255,40 Intensity = 1 Result = 40,255,40 |
R,G,B = 40,255,40 Intensity = 3 Result = 120,255,120 |
![]()
Intensity Dialog Box
The Intensity dialog box lets you define three coefficients using the slider or by entering a value directly in the corresponding box:
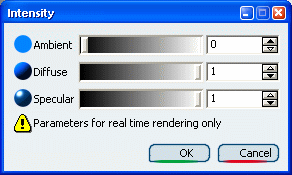
| Ambient | Defines the intensity of light emitted in any direction by the object, even if not lit by any light source. |
| Diffuse | Defines the intensity of light diffused by the object when lit by a light source. |
| Specular | Defines the intensity and color of light reflected in one particular direction. This coefficient affects the highlight on shiny surfaces. |
These three coefficients only impact the material aspect. They are identical to those used to define the Modifying Material Lighting Properties (and are used in combination with them) but have no influence on the material definition.
Example of use: when visualizing a model on screens with different characteristics (e.g. LRT screen versus LCD screen), you can recalibrate the screen simply by modifying the light intensity using these three coefficients. You do not need to modify all the materials.
The following images show how Ambient, Diffuse and Specular coefficients impact the material aspect:
- no relief
- no highlight

- relief
- no highlight
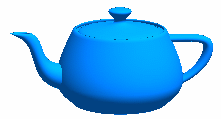
- no relief
- highlight
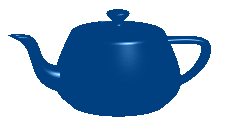
![]()
Light Energy Attenuation
You can choose between different kinds of parameters.
Lighting Falloff
You can set the light energy attenuation in the Falloff box in the Lighting tab
:
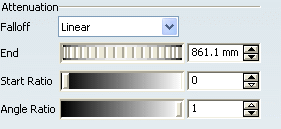
| None | No lighting end which means that the light energy will be constant and infinite. The cone limits, however, are kept. |
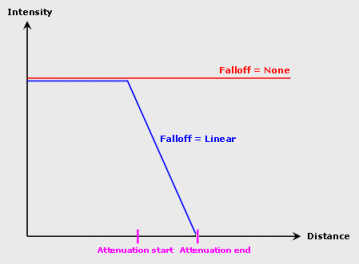
| Linear | Light energy decreases linearly with a 1/r ratio ("r" = distance to light origin) and stops at attenuation end. For instance, if the energy received at a distance of 10 mm from the light origin will be equal to 1/10th of the light energy at light origin. |
| Important:
Directional lights do not disperse and therefore have no falloff.
The following picture illustrates the three different types of
light energy attenuation:
|
Attenuation End
Defines in millimeters the maximum distance for light attenuation (i.e. the distance to the center from which the light source does not illuminate).
 |
 |
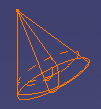
Attenuation Start Ratio
Defines as a ratio the minimum distance for light attenuation.
For example:
- 0 corresponds to an attenuation starting from the center
- 0.5 corresponds to an attenuation starting from the middle
- 1 corresponds to an attenuation starting from the end, i.e. a null attenuation.
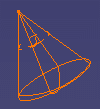 |
 |
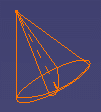
Attenuation Angle Ratio
Defines as a fraction of the light angle the angle to the light
axis from which the light starts to attenuate.
For example:
- 0 corresponds to an attenuation starting from the axis
- 0.5 corresponds to an attenuation starting from the half-angle
- 1 corresponds to an attenuation starting from the end, i.e. a null attenuation.
 |
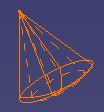 |
Note: You can also position your pointer over one of the side lines then click and drag the segment to modify the attenuation angle ratio.
