Creating a One-Face Sphere Environment | ||||||
|
| |||||
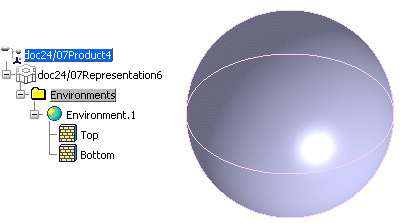
Click Create Spherical Environment
 in Scene Editor toolbar (Create Environment sub-toolbar)
to create an environment being a non-dimensional sphere with two hemispheres:
Top and Bottom.
in Scene Editor toolbar (Create Environment sub-toolbar)
to create an environment being a non-dimensional sphere with two hemispheres:
Top and Bottom.Zoom out then click anywhere in the geometry area to deselect the environment.
Select the Dimensions tab which enables you to define the environment size as well as the geometry type:
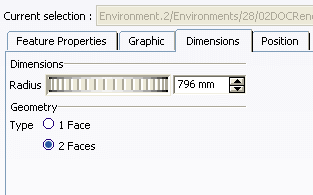
Select 1 Face then click OK or Apply then OK to validate.
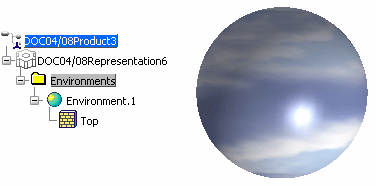
As the environment is changed into a one-face environment, the Top wall is extended to the whole sphere and the bottom wall disappears as indicated by the specification tree:
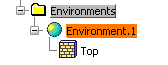
Right-click then select Top object > Definition.
The Properties dialog box is displayed:

Click
 next to the Image Name box to search for the appropriate
image.
next to the Image Name box to search for the appropriate
image. Click OK to validate and go back to the Properties dialog box:
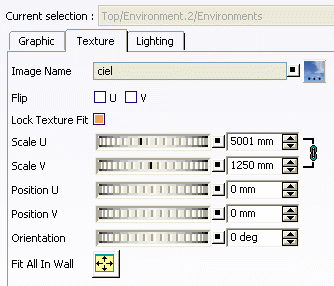
Click OK or Apply then OK.
The texture image you selected is mapped continuously onto the whole environment as shown below:
As for a standard environment, you can Creating a Standard Environment the one-face environment and modify its Creating a Standard Environment and Creating a Standard Environment.
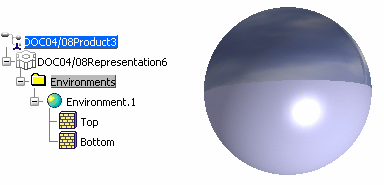
Whenever you wish to switch from one to two faces, re-access the environment properties (by right-clicking the environment in the specification tree then selecting Properties) and select 2 Faces.
In that case, the Bottom wall appears as it was before switching to 1 Face. In our example, no texture image has been applied to Bottom wall before and thus, the environment looks like this:
Note that when the Creating Real Time Ground Shadowsoption is activated, shadows are cast on the environment as well.