Creating a Standard Environment | ||||||
|
| |||||
Click Create Rendering Scene
 in Scene Editor toolbar.
The Rendering Scene Creation dialog box appears.
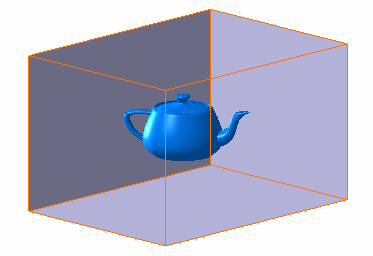
Click Create Box Environment
 in Scene Editor toolbar (Create Environment sub-toolbar)
if you want to create an environment with a rectangular shape (to represent
a room for example).
in Scene Editor toolbar (Create Environment sub-toolbar)
if you want to create an environment with a rectangular shape (to represent
a room for example). Zoom out then click anywhere in the geometry area to deselect the environment.
The Box environment is taken as an example in this scenario but you can also:
-
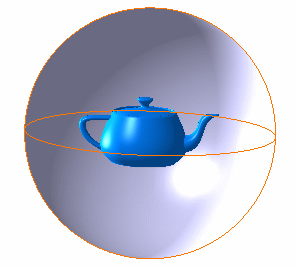
click Create
Spherical Environment
 if you want an environment being a non-dimensional sphere
with two hemispheres: top and bottom (to simulate a sky
for example):
if you want an environment being a non-dimensional sphere
with two hemispheres: top and bottom (to simulate a sky
for example):
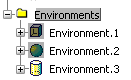
You can create several environments at the same time. They will all be visible and active. If you want to have only one environment active, right-click the other environments in the specification tree then select Hide/Show. In our example, Environment 1 and Environment 2 are deactivated, and Environment 3 is active.
To activate an environment, right-click it in the specification tree then select Hide/Show.
-
click Create
Spherical Environment
Position your pointer over the edges then use the green segments
 displayed
to resize the environment walls:
displayed
to resize the environment walls: - Drag a segment to resize the walls according to the edges
- Press the Shift key and drag a segment to resize the walls according to the center.
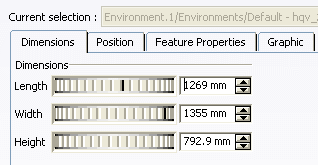
Select the Dimensions tab to define the environment size. In our example, specify the Length, Width and Height of the walls in millimeter.
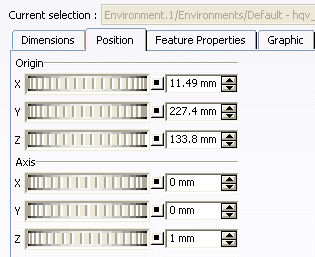
Select the Position tab to interactively define:
-
The environment translation from the origin along the X, Y or Z axis
-
The environment translation along the X, Y, or Z Axis.
The Feature Properties tab provides general information on the currently selected environment, e.g. its name, its creation date, etc.
You can now move on to Managing Environment Walls or Snapping the Bottom Wall to the Geometry.
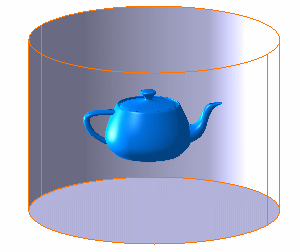
-
 if you want an environment having a cylindrical shape: