Defining the Wallpaper

You can associate images to your environment walls and how to adjust the texture properties of the selected image.

The following topic is discussed:

This task shows you how to:


Before you begin: Create an environment.
Related Topics
More about Defining the Wallpaper
Creating a Standard Environment
Managing Environment Walls
Creating a One-Face Sphere Environment

Associating Images to Environment

You can associate images to an environment.

  1. In the specification tree, select any wall of the environment onto which you want to apply a wallpaper.

  2. Right-click and select Properties or xxx object > Definition .

    The Properties dialog box is displayed:

  3. Select the Texture tab.

  4. Click next to the Image Name box to search for the desired image.

  5. Search or import the desired image using the Object Selection.

    For more information on how to use this dialog box refer to Using the Chooser in the Infrastructure User Guide .

  6. Click OK to validate and go back to the Properties dialog box:

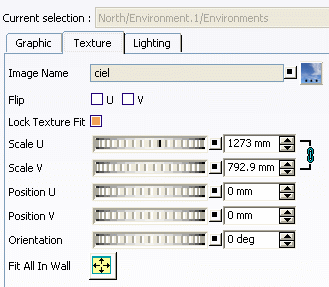
Adjust the Texture Properties

Once a file name has been entered in the Image Name box, the other boxes become active to let you edit them.

  1. The Flip U, V check boxes let you invert the material texture along U and V axes.

  2. Select the Lock Texture Fit check box if you want to prevent texture fit alteration when modifying the environment size.

  3. Define the image repetition along U and V, as well as its scale, its position and its orientation:

    You can click the Links U and V scales button to resize U and V proportionally. This is especially useful for square shapes such as the floor material.

  4. Click the Fit All In Wall button to automatically scale the texture in order to fit it in the wall.

  5. Click the Lighting tab and select the On check box if you want to enable shadow casting on the wall.When the option is cleared, the wall is visible even if not illuminated.

    Important: Note that this option is used for rendering only.

  6. Click OK or Apply and OK to validate.

    The material texture is mapped onto the selected wall.

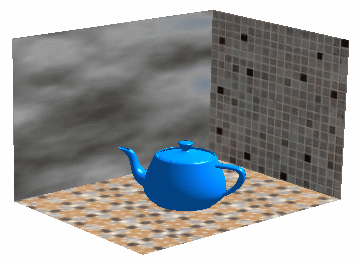
    Important: As far as showroom environments are concerned, you can apply a different image to each wall of the environment.