Adding Insulation | |||||||
|
| ||||||
Add Insulation to the Pipe
You can add insulation to the pipe for full length or partial length.
Click Edit
 > Insulate
 > Add Insulation
 in the balloon.
The Table Browser dialog box opens.
Optional: Select one of the following options to add the insulation:
- Non-spec Insulation
 displays the insulation definition without specifications.
 - In-spec Insulation
 filters the insulation definition according to the list of insulation specifications defined in the PRM.
 - Out-of-spec Insulation
 displays the list of all insulation specifications defined in PRM.
 - Use an existing insulation on reference part
 allows you to copy insulation from an existing one. For more information, see Add Insulation by Using an Existing Insulation.
- Non-spec Insulation
Optional: Select Insulate Pipe Partially
 for partial insulation or Insulate Whole Pipe
 for full length insulation.
Note: For partial insulation, you need to select two node points. Insulation is created between these two node points.
Enter details and click Finish.
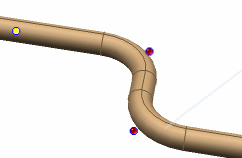
The insulation is added to the rigid / flexible pipe and start and end insulation points are displayed at the insulation extremities.
Note:
You can add multiple insulation to the rigid / flexible pipe. Figure below illustrates two insulations added on one pipe.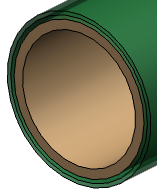
![]()
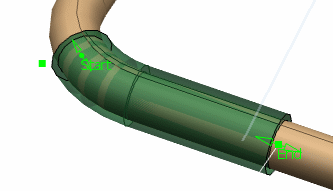
Add Insulation to the Pipe Using an Existing Insulation
You can add an existing insulation on a pipe or a part.
Click Modify
 in the Compass Toolbar.
Click Edit
> Insulate > Add Insulation in the balloon.The Table Browser dialog box opens.
Select Use an existing insulation on reference part
.
![]()
Add Insulation to the Part Using the Existing Shape Option
You can add insulation using the standard geometrical shapes like parallelepiped, cylinder and sphere.
Click Modify
in the Compass Toolbar.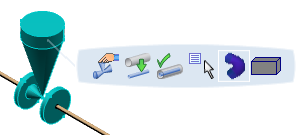
In the balloon, select Edit
> Insulate.The Table Browser dialog box opens and displays the insulation definitions available.
In the balloon, select Add Insulation
> Non-spec Insulation > System Defined Shape  > Parallelepiped
  .
.
Insulation is added to the part.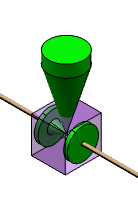
Note:
- You can similarly add insulation of the shape cylinder and sphere using the Cylinder
 and Sphere
  options respectively.
 - You can match the orientation of the insulation object using the Flip Insulation
 option.
![]()
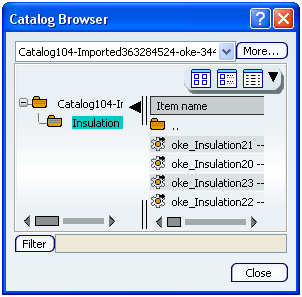
Add Insulation to the Part Using the Catalog Browser
You can add the insulation from an insulation catalog using the Open Catalog Browser option.
The insulation catalog should have two attributes listed: InsulationType and InsulationThickness. Depending upon the specification option set and the nominal size of the piping part, the attribute value for InsulationType and InsulationThickness are retrieved from the resource table set for the respective specification. Part matching in the these two attribute value are searched in the catalog.
Select Modify
in the Compass Toolbar.In the balloon, select Edit
> Insulate > Add Insulation > Use an existing insulation on reference part > Open Catalog Browser  .
.The Catalog Browser opens.
Select the chapter of the catalog in the left-hand column of the Catalog Browser dialog box.
All the parts belonging to the selected chapter are listed in the right-hand side of the Catalog Browser dialog box.
Insulation is added to the part.
![]()
Add Insulation to the Part Using the PLM Chooser
You can add the already loaded insulation object in the session using the Open PLM Chooser option.
Select Modify
in the Compass Toolbar. 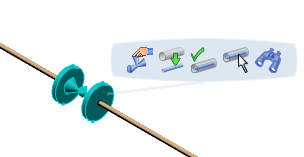
In the balloon, select Edit
> Insulate > Add Insulation > Use an existing insulation on reference part > Open PLM Chooser  .
.The Object Selection dialog box appears.
To add the insulation using the Search option:
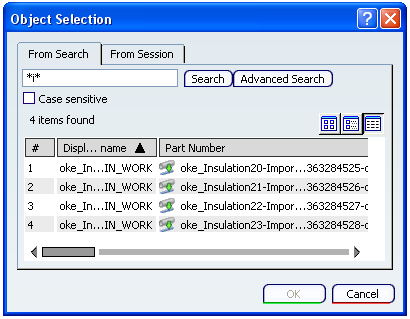
To add the insulation loaded in the session:
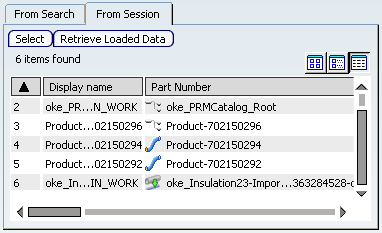
Insulation is added to the part.
Note:
You can match the orientation of the insulation object using the Flip Insulation option.
![]()
Add Insulation to the Part Based on Values in PRM Table
You can add insulation on a piping part from catalog browser based on values in PRM table.
The part catalog set in the Piping/Tubing Discipline Resource set must contain a chapter named Insulation with at least two keywords InsulationThickness and InsulationType. The other PRM resources should also be assigned.
Select Modify
in the Compass Toolbar.In the balloon, select Edit
> Insulate > Add Insulation > Non spec insulation > Search and Instantiate insulation from Catalog  .
.
Note: Depending upon the specification option and the nominal size of the piping part, the values of the InsulationType and InsulationThickness attributes are selected from the PRM table set for the particular spec.
If only one insulation reference in the catalog matches the attribute value, the insulation reference is instantiated.
If more than one insulation reference have the same attributes, a catalog browser opens. You can select the reference of your choice from the catalog browser.