Managing Local Information | |||||||||
|
| ||||||||
Manage Local Information on Rough Turning Operation
You can manage Local Information on a Rough Turning operation. This feature is applicable only for Rough Turning operation and is not applicable for roughing operations like Ramp Rough, Ramp Recess etc.
Still in the Geometry tab.
-
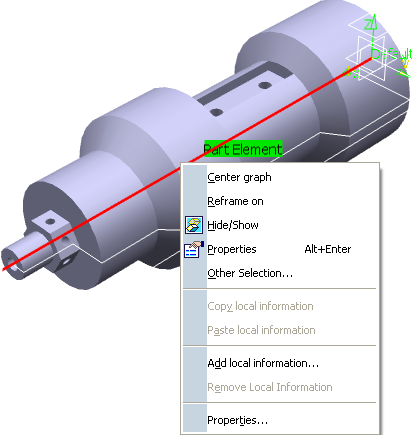
Right-click an element in 3D window and select Add Local Information from the contextual menu, to add local information on an element of the profile.
Local Information can be added on lines, arcs, and curves of a part profile.
The Local Information Editor dialog box appears.
Note: Local feedrate is currently not supported in Local Information for a part profile in Rough Turning operation.
- Set the information you want and then click
OK in the Local Information Editor dialog box.
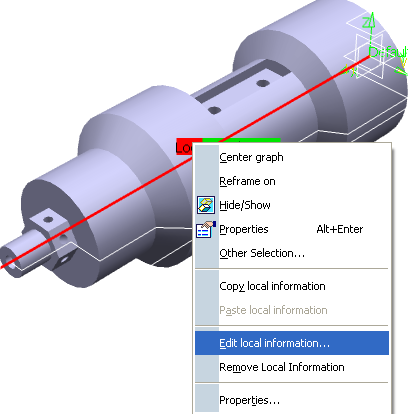
A RED Loc tag on associated part element in the 3D window shows that local information has been added.
-
Right-click an element in 3D window and select Add Local Information from the contextual menu, to add local information on an element of the profile.
Right-click an element in 3D window and select Edit Local Information from the contextual menu, to edit Local Information from an element after you have added local information.
Modify the local information in the Edit Local Information dialog box.
Click Properties.
OR Right-click Part area profile in the Geometry tab and select Properties from the contextual menu to access Properties dialog box.
The Properties dialog box appears listing all the part elements that have local information.


![]()
Manage Local Information on Finishing Operations
You can manage Local Information (local feedrates and offsets) on a Profile Finishing or Groove Finishing operation.
Right-click an element in 3D window and select Add Local Information from the contextual menu to add local information on an element of the profile.
The Local Information Editor dialog box appears.

Click Properties.
OR Right-click Part area profile in the Geometry tab and select Properties from the contextual menu to access Properties dialog box.
The Properties dialog box appears listing all the part elements that have local information.

