Creating a Material with a Domain | |||||
|
| ||||
Search for the material category by using either of the following methods:
- Type Material in the Find
box, and click
 .
. - Expand the All Types node, and locate the Material category.
- Type Material in the Find
box, and click
Select the material domain to be created.
The following domains are available:
- Rendering: adds visualization properties to a material (available both for core and covering materials).
- Drafting: adds hatching pattern properties to a material (available for core materials only).
- ELFINI Linear Elastic: adds physical properties to a material for Structural Analysis simulations (available for core materials only).
- Composite: adds geometric properties to a layered composite material (available for core materials only).
- Simulation: adds physical properties to a material for DesignSight simulations (available for core materials only).

Important: You can add only the domains for the configurations or products you installed and for which you have a license. For example, if you do not have a license for Drafting products, Drafting is not listed. This does not apply to the ELFINI linear elastic domain for which no specific product needs to be installed with the corresponding license. Click Next.
The material creation dialog box appears.
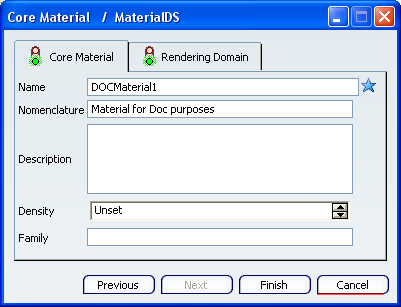
Tip: For more information about the symbols in the above dialog box, see Creating New Objects. In this dialog box you must specify the PLM attributes for the material and the domain. The attributes available in this dialog box as well as the name of the dialog box can be customized by the PLM administrator.
Important: The average density that is specified as a PLM attribute for the material is unset by default. A material density can also be specified as an ELFINI linear elastic domain attribute; the ELFINI linear elastic density is used for more complicated analysis calculations in the Structural Analysis workbench. Material attributes appear under the first tab. Attributes for the selected domain appear under the second tab; in this example, the domain attributes tab corresponds to Rendering.