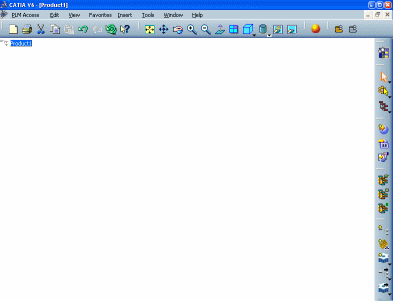
Creating New Objects | |||
| |||
Click New
 in the Standard toolbar or select PLM Access > New... (or
press CTRL+N):
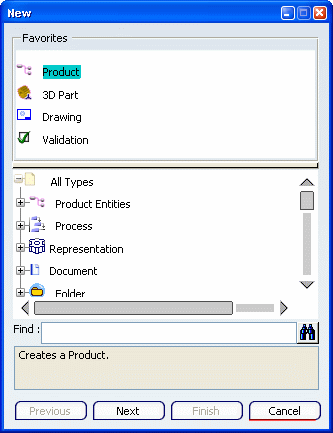
Warning: You can create only the objects for the configurations/products you installed and for which you have a license. For instance, if you do not have a license for Drafting products, the Drawing object is not listed. If the object you want to create is displayed in the Favorites list, select it.
In this scenario, Product is selected.
The Favorites list lets you create the most frequently used objects, for instance:
- Product: lets you create a standalone product, i.e. without any representation.
- 3D Part: lets you create a product with a 3D shape representation.
- Drawing: lets you create a drawing representation.
- Validation: lets you create a validation object.
Product, 3D Part and Drawing can also be created by selecting PLM Access > Product..., PLM Access > 3D Part... or PLM Access > Drawing....
Important: - When a workshop is selected through the PLM Access menu, the information stored in preference files is retrieved and the last opened workbench of the selected workshop opens. If this workbench is not available (i.e. not locked), then another workbench of the selected workshop opens and preferences are updated.
- If a workbench has been locked, then another workbench of the selected workshop opens. Even when the locked workbench is unlocked afterwards, the PLM Access menu will only let you open another workbench of the selected workshop.
To open the workbench of your choice through the PLM Access menu, first use the Start menu which opens only the selected workbench and updates preferences accordingly. For instance, if you select Start > Mechanical > Part Design, this opens the Part Design workbench. Then, if you select PLM Access > 3D Part, this will also open the Part Design workbench.
Optional: Add an object to the Favorites list.
- Right-click the object in the All Types list.
- Select Add to favorites: the object is displayed in the Favorites list but is not saved.
- Repeat the operation to create as many favorites as necessary.
Optional: Rename a favorite object.
- Right-click a favorite object that you have created.
- Select Rename.
- In the Rename favorite dialog box, type the
name of your choice in the New name box:
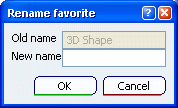
- Click OK: the new name is displayed in the Favorites list.
- Repeat the operation as many times as necessary to rename several favorites.
Important: - The Remove contextual command lets you delete a favorite you have created. This does not apply to default favorites which can be neither removed, nor renamed.
- Any modification made to the favorites (creation, renaming or removal) is saved in CATSettings files. But if you close the New dialog box without creating the object, the modifications made to the Favorites list are not kept.
To create objects other than those in the Favorites list:
- Select the object of your choice in the All Types list (which is, by default, expanded at the first level).
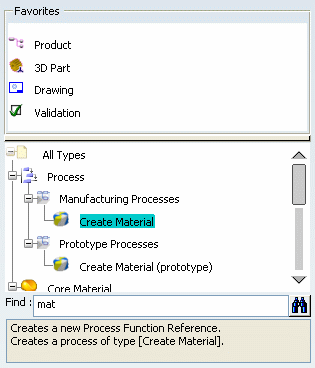
- In the Find box, enter a search
string corresponding to the object you want to create (for
example, "mat" to search for "material"), then click
 or press Enter. Then, in the search results displayed
in the All Types list, select the object you want
to create:
For more information on each object type, see the documentation of interest.
Click Next. Depending on the object you create:
- The object is directly created. In that case, you do not need to perform the next steps.
- An additional dialog box opens if the creation
requires specific attributes to be defined. For instance,
when creating a product:
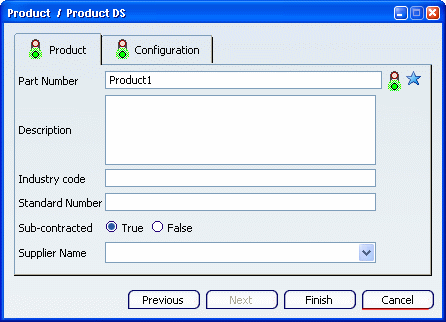
Define the required attributes, if necessary:
 means that the attribute is an identification attribute.
When
several identification attributes are available, at least one
of them must be valuated. The attribute to be
valuated is identified by the red light symbol described below.
 means
that the attribute is mandatory but has not been valuated.
 means
that the attribute is mandatory and has been valuated.
Warning: - By default, you can create an object only if Next is available. However, if the Always display interactive dialog for attributes option is cleared, only Finish is available to let you directly create the object.
- When an attribute is modified, a check is
performed to make sure that mandatory attributes are
defined and, if an identification string is used, a
check is performed through a
Business Logic rule. If an error occurs, the
green light symbol
 turns red
 and
an easy
warning is displayed to explain why the object
cannot be created (you can display the easy warning as many
times as necessary by pointing to the tab with
the red light symbol).
Click Finish.
