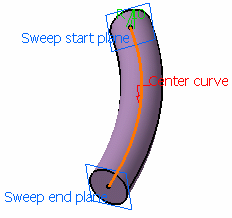
Create a Swept Volume with an Explicit Profile
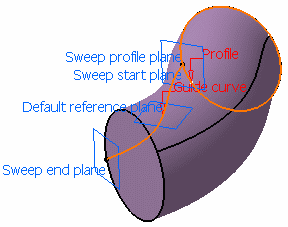
You can create a swept volume by sweeping out an explicit profile taking other user-defined
parameters (such as guide curves and reference elements) into account.
With reference surface
You can create a swept volume with explicit profile by defining reference surface and guide curve.
Click Volume Sweep  in the Volumes toolbar. in the Volumes toolbar.
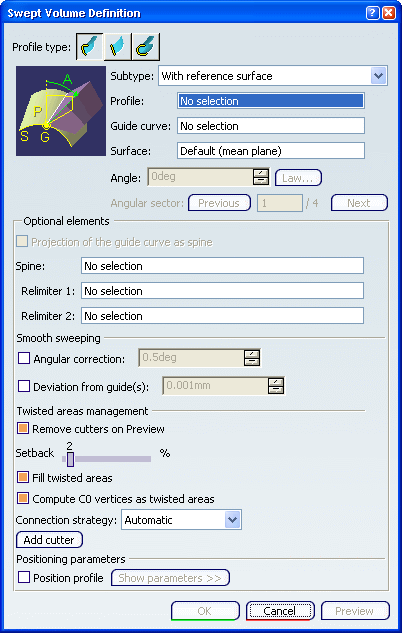
The Swept Volume Definition dialog box appears.
Click the Explicit profile type icon. In the Subtype list, select With reference surface.

In the
Profile box, select a profile to be swept out. In the Guide curve box, select a curve. Select a surface
(by default, the reference surface is the mean plane of the spine) in
order to control the position of the profile during the sweep.
Note that in this case, the guiding curve must lie completely on this
reference surface, except if it is a plane. You can impose an angle
on this surface.

Click OK
to create the swept volume.
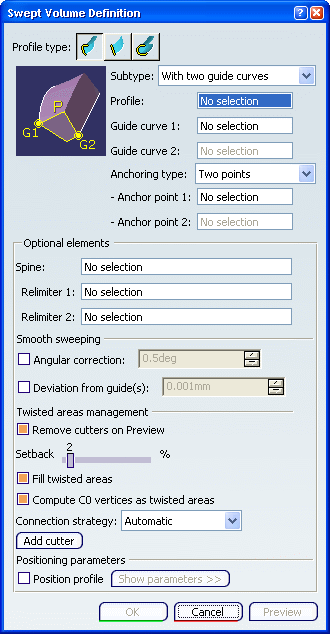
With two guide curves
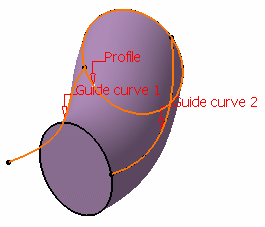
You can create a swept volume with an explicit profile by defining two guide curves.
Click Volume Sweep
 . . The Swept Volume Definition dialog box appears. Click the Explicit Profile type icon. In the Subtype list, select With reference surface.

In the
Profile box, select the profile to be swept out. In the Guide curve 1 box, select a guide curve. In the Guide curve 2 box, select a second guide curve.

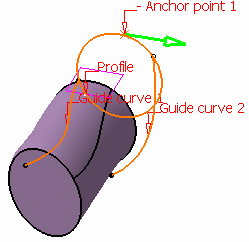
You can also specify anchor points for each guide.
These anchor points are intersection points between the guides and
the profile's plane or the profile itself, through which the guiding
curves will pass. There are two anchoring types:
-
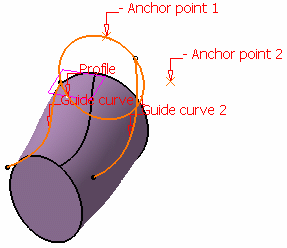
Two points: select anchor points on the
profile that will be matched respectively to guide curve 1 and 2.
These points must belong to the sweeping plane of the profile.
If the profile is open, these points are optional and the
extremities of the profile are used.
- Point and direction: select an anchor point on the
profile which will be matched onto guide curve 1 and an anchor
direction.
Sweep without positioning
Two points anchoring type

Sweep without positioning
Point and direction anchoring type

If you do not explicitly
select anchor points or anchor direction, they are automatically
computed if the profile is planar. Note that the selection is still
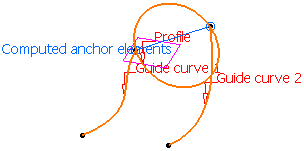
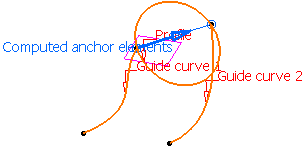
available. The anchor points are computed as follows:
-
For Anchor point 1: intersection between the profile plane and
Guide curve 1 (I1).
- For Anchor point 2: intersection between the plane, passing
through Anchor point 1 and normal to the spine, with Guide curve 2
(I2).
- For Anchor direction: line between I1 and I2.

Automatic computation for Two points anchoring type

Automatic computation for Point and direction anchoring type

Click OK to create the swept volume.
With pulling direction
You can create a swept volume with explicit profile by defining pulling direction and guide curve.
The With pulling Direction subtype is equivalent to the With reference surface subtype with a reference plane normal to the pulling direction.
Click Volume Sweep
 . .
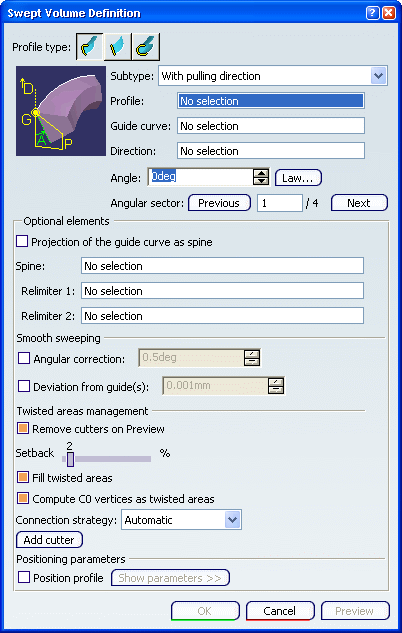
The Swept Volume Definition dialog box appears.
Click the Explicit Profile type icon. In the Subtype list, select With pulling direction.

In the
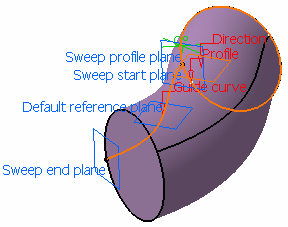
Profile box, select the profile to be swept out. In the Guide curve box, select the curve. In theDirection box, select a direction.

Click OK
to create the swept volume.

Create a Swept Volume with a Linear Profile
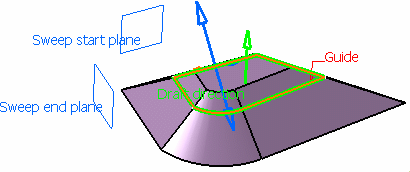
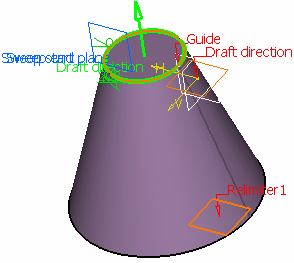
You can create swept volume with a linear profile by defining guide curve and draft direction.
Click Volume Sweep
 . .
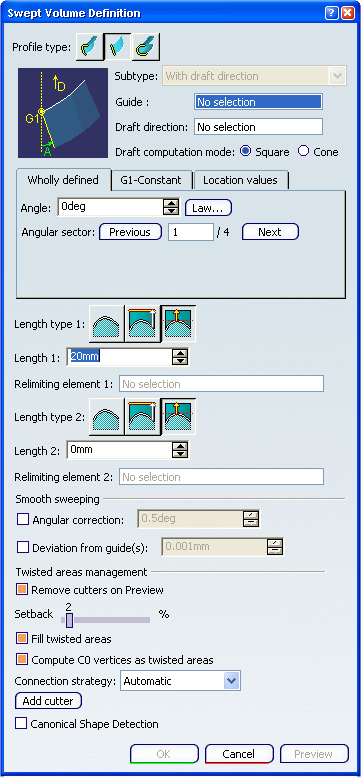
The Swept Volume Definition dialog box appears.
Click the Line Profile type icon.
The With draft direction sub-type is automatically
selected and grayed out.

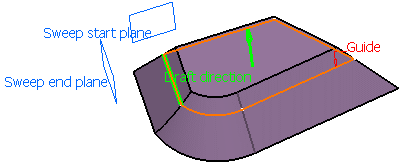
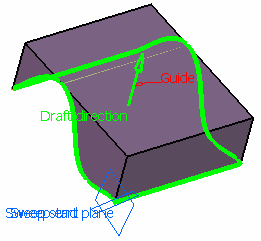
Select a guide curve (closed planar curve or any surface
(planar or non-planar)) and a draft direction (a line, a plane or
components). Select the draft computation mode:
- Square: a plane normal to the draft direction is
used as the reference surface and the projection of the guide curve
onto this plane is used as the spine.
- Cone: envelop of cones defined along a given curve.
In order to have swept start and end planes similar as the square
mode, the guide curve needs to be extrapolated and the resulting
volume split.
Choose the angular definition:
- Wholly defined: the angular value varies during the
whole sweeping operation.
- G1-Constant: a different draft value for every G1
section can be set; in this case, a relimiting plane is requested
when defining lengths
- Location values: on given points on the curve,
angular values can be defined.
Choose the length types:
- From curve: the swept volume starts from the curve
- From/Up to: the length is computed by intersecting a
plane or a surface; a point can be selected: a plane parallel to
the draft plane would be computed
- From extremum: the lengths are defined along the
draft direction from an extremum plane; L1 corresponds to the
"maximum plane" in the draft direction, L2 corresponds to the
"minimum plane" in the draft direction.


Click OK to create the swept volume.

Create a Swept Volume with a Circular Profile
You can create a swept volume with a circular profile by defining the center curves and other parameters.
The following subtypes are available:
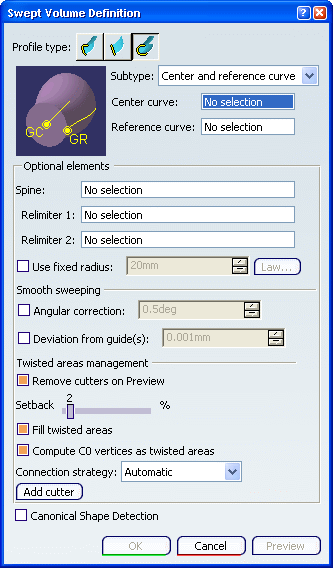
Center and reference curve
You can create a swept volume with circular profile by defining center and reference curves.
Click Volume
Sweep
 . . The Swept Volume Definition dialog box appears.
Click the Circle profile icon. Select Center and reference curve
from the Subtype list.

Select a Center curve and a
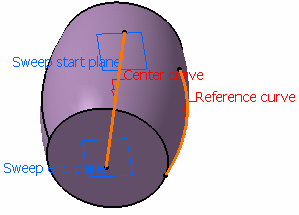
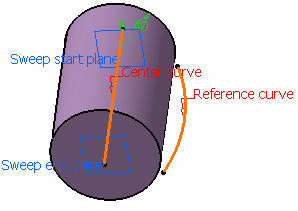
Reference curve. Define a fixed radius if needed. No fixed radius defined

Fixed radius = 40mm

Click OK to create the swept volume.
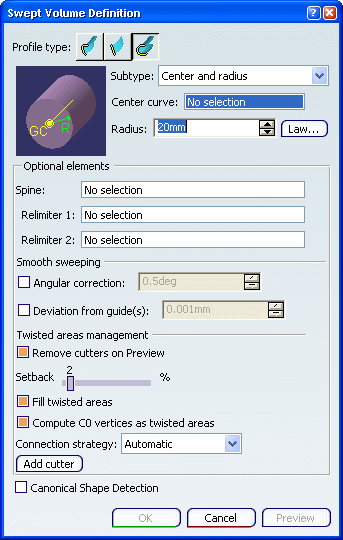
Center and radius
You can create a swept volume with circular profile by defining center curve and radius.
Click Volume
Sweep
 . . The Swept Volume Definition dialog box appears. Click the Circle profile icon. Select Center and radius from the
Subtype list.

Select a Center curve (DemoCurve2) and enter a
Radius value (10mm).

Click OK to create the swept volume.
Preview the Angular Value
You can preview the various solutions you can get after completion of operation.
When creating a swept volume, you are now able to preview
the four solutions based on the values given for the Angle and
Lengths. The first solution corresponds to Angle, Length1 and
Length2 values, the second solution to -Angle, Length1 and Length2
values, the third solution to Angle, Length2 and Length1 values, and
the fourth solution to -Angle, Length2 and Length1 values.  The orange arrow corresponds to the current solution.
- Click on any arrow then on Preview or OK to
recompute the swept volume. You can also use the Previous or
Next buttons or enter a solution number in the Angular
sector box:

Define Relimiters
You can define relimiters to get expected swept volume.
- Relimiters can be selected on a closed curve (curve, spine,
or default spine). In that case, you are advised to define points as relimiters, as plane selection may lead to unexpected results due to
multi-intersection.
- You can relimit the default spine, thus avoiding to split it to
create the swept volume.
Smooth
You can define the smoothing parameters on the swept volumes.

Check Angular correction to smooth the sweeping
motion along the reference surface. This may be necessary when
small discontinuities are detected with regards to the spine tangency
or the reference surface's normal. The smoothing is done for any
discontinuity which angular deviation is smaller than 0.5 degree, and
therefore helps generating better quality for the resulting swept
volume. By default, the angular correction is set to 0.5 degree. Check Deviation from guide(s) to smooth the sweeping motion by
deviating from the guide curve(s). A Smoothing Curves is performed using
correction default parameters in tangency and curvature. This option is not available for with tangency surface subtype.
Remove Twisted Areas
During creation or edition, you can generate swept
surfaces that have a twisted area by delimiting the portions of the swept
surface to be kept.
The generated surface is therefore composed of several
unconnected portions.

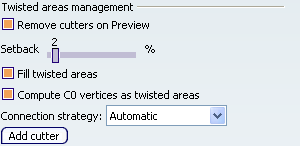
Select the Remove cutters on Preview check box to remove the twisted areas
management each time you click on Preview.
This option is selected by default. Use the Setback slider to define a distance to move all the cutters from the twisted
areas. It is defined as a percentage of the guide length from 0 to 20%. Its
default value is 2%. Select the Fill twisted areas
check box to fill the twisted zones. It is activated by default.
Select the Compute C0 vertices as twisted areas check box to fill the C0 vertices areas taking into account the setback value. It is activated by default. Note:
This option is unavailable with the With tangency surface and With two tangency surfaces subtypes of the linear profile, and One guide and tangency surface subtype of the circular profile.
Use the Connection
strategy drop-down list to choose the connection mode
for the filled areas. The three options are:
- Automatic:
this mode chooses the best connection strategy depending on the geometry.
- Standard:
this mode maintains the sweep profile.
- Similar to guide:
this mode maintains the point continuity.
Click the Add cutter
button allows you to create cutters on the main guide of the sweep.
Detect Canonical Shapes
You can detect the canonical shapes if they exist in the swept surface.

|
![]()
![]()
