Debugging a User Feature | |||||
|
| ||||
Before you begin: Refer to the User Features and Power Copies: Sample topic to create the model required to perform this scenario.
Creating and Instantiating a User Feature Using the White Box Mode
Important:
The White Box mode enables you to visualize what
is inside the User Feature instance when the instantiation is
not what you expected. The internals of the User Feature
are visible in the tree but they are considered as private elements.
It is important that you:
|
- Expand the KnowledgeTemplates node and double-click Pad1 to open the Userfeature Definition dialog box.
- Click the Properties tab and select White Box in the Mode combo box.
- Click OK when done.
- Save your file but do not close it.
- Create a representation made up of two 2 points and a surface.
-
Click Instantiation From Selection
 and from the Window menu, access the sample file. A dialog
box is displayed informing you that you are about to instantiate
a User Defined Feature in White Box mode.
and from the Window menu, access the sample file. A dialog
box is displayed informing you that you are about to instantiate
a User Defined Feature in White Box mode.
- Click OK. Click Point.2, Point.3 and the Pad in the geometry and click OK. The User Feature is instantiated. Expand the User Feature (Pad2.1) node in the specification tree. The User Feature internals are displayed.
![]()
Creating and Instantiating a User Feature Using the Black Box Mode
| Important: The Black Box mode is the standard mode. It simplifies the user view, and limits the exposition of the User Feature internals. |
- Double-click Pad1 to open the Userfeature Definition dialog box.
- Click the Properties tab and select Black Box in the Mode combo box.
- Click OK when done. Save your file but do not close it.
- Create a representation made up of two 2 points and a surface.
-
Click Instantiation From Selection
and from the Window menu, access the sample file.
- Click Point.2, Point.3 and the Pad in the geometry and click OK. The User Feature is instantiated.
-
Click the instantiated User Feature (Pad2.1) in
the specification tree and click User Feature Debug
 .
A warning message is displayed:
.
A warning message is displayed:
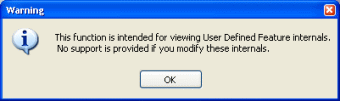
- Click OK. The Pad2.1 node expands and the User Feature internals are displayed.
![]()
Creating and Instantiating a User Feature Using the Black Box Protected Mode
| Important: The Black Box Protected mode ensures a locked view of the User Features thus ensuring secure exchanges. |
- Double-click Pad1 to open the Userfeature Definition dialog box.
- Click the Properties tab and select Black Box Protected in the Mode combo box. A dialog box is displayed informing you that after clicking Yes, you will not be able to access the User Feature internals. click Yes.
- Click OK when done. Save your file but do not close it.
- Create a representation made up of two 2 points and a surface.
-
Click Instantiation From Selection
and from the Window menu, access the sample file.
- Click Point.2, Point.3 and the Pad in the geometry and click OK. The User Feature is instantiated.
-
Click the instantiated User Feature (Pad2.1) in
the specification tree and click User Feature Debug
.
A dialog box is displayed informing you that you cannot display
the internals of the User Feature.
Important: If you want to protect your data and ensure IP protection, it is recommended to create the User Feature in White Box or Black Box and to delete the items making up the User Feature.