Creating a User Feature | ||||
|
| |||
Create a 3D Shape Representation identical to the one below.
Note: Datums features that cannot be calculated cannot be inputs of User Features.
Click
 and select Knowledgeware > Templates > Product Knowledge
Template workbench.
and select Knowledgeware > Templates > Product Knowledge
Template workbench.Click User Feature
 .
The User Feature Definition dialog box is displayed.
Replace the default User Feature name with a new name, Pad2 in this
example, and select the components that will make up the User Feature
in the specification tree. The dialog box looks like the one below:
.
The User Feature Definition dialog box is displayed.
Replace the default User Feature name with a new name, Pad2 in this
example, and select the components that will make up the User Feature
in the specification tree. The dialog box looks like the one below: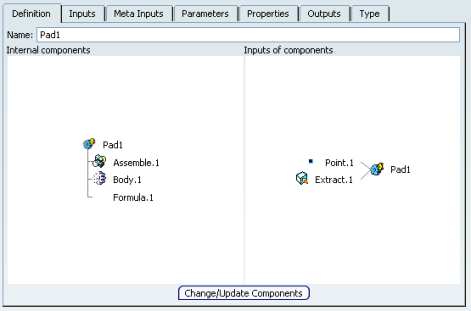
Right-click on the Assemble.2 object in the Selected components section and click on the Add all authorized inputs as shown here below:
Select any of the available inputs and click either on
 or
or
 icons to reorder the selected one. Point.2 is now placed under Point.3.
Note: When creating the User Feature, you can add a link between the User Feature instance and its references. This link enables you to open the representation containing the User Feature reference using a contextual menu on the User Feature instance .
By default, this option is enabled. If you want to disable it definitively, select the Properties tab in the User Feature Definition window and uncheck Set Reference/Instance link in the Instantiation field.
The link between the User Feature instance and its reference can be seen using Edit > Links&Relations or the Impact Graph. When working with a User Feature instance, the contextual menu enables you to open the User Feature reference.