Creating Thin Solids | ||||||||
|
| |||||||
Click Pad
 in the Sketch-Based Features toolbar (Pads sub-toolbar).
Select the Thick check box.
This opens the whole Pad Definition dialog box. You can now define a thin pad using the options available in the Thin Pad frame.
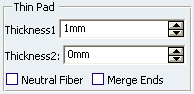
Important: The options for creating thin solids are not available when you select a surface as the element to be extruded. For more information, see Creating Pads or Pockets from Surfaces. Enter 18mm as Thickness1 's value, and click Preview to see the result.
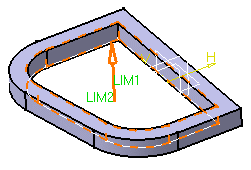
A thickness has been added to the profile as it is extruded. The profile is previewed in dotted line.
Enter 10mm as Thickness2 's value, and click Preview to see the result.
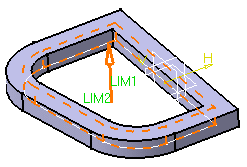
Material has been added to the other side of the profile.
To add material equally to both sides of the profile, select Neutral fiber and click Preview to see the result.
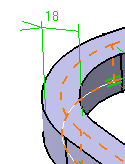
The thickness you defined for Thickness 1 is evenly distributed: a thickness of 9mm has been added to each side of the profile.
Tip: This capability can be applied to several profiles contained in the same sketch.