Creating a Sequential Part Transfer Activity | |||||
|
| ||||
Create the Setups
You can create several Setups in the Part Operation.
From the product containing the part to machine:
- Alternatively, open an existing Machining Process or PPR context .
 By default,
the
Activities Process Tree opens
automatically.
By default,
the
Activities Process Tree opens
automatically.
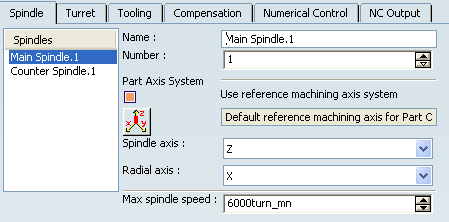
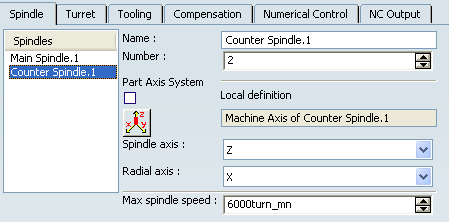
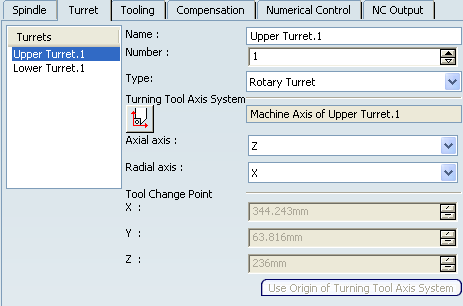
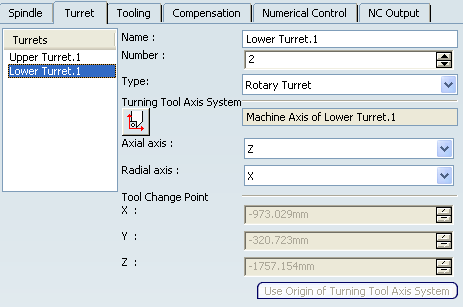
In our example, we have set the following in Generic Machine dialog box.
- Alternatively, open an existing Machining Process or PPR context .
Go to the Setup
 tab in the Part Operation. Define Setup1, then click + to add Setup2 and Setup3, as described in Creating a Part Operation.
- Order the Setups in the order you require.
- Click OK when you are done to validate and exit the Part Operation dialog box.
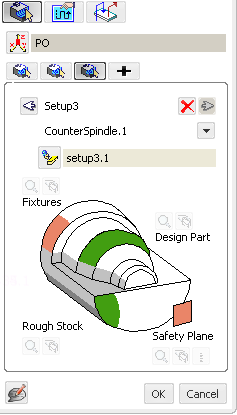
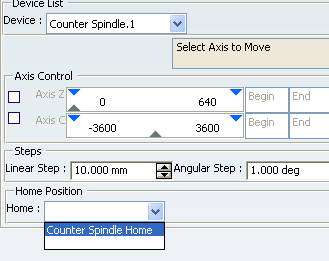
In our example, we need three Setups:
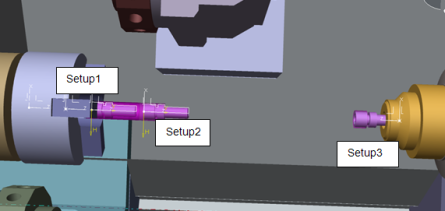
- Setup1: the part is attached on the machine by the Main Spindle.1, which is visible.
- Once the machining in Setup1 is done, the Counter Spindle.1 grabs the part to take it to Setup2, where it is cut off.
- In Setup2, the Main Spindle.1 is detached and invisible.
- Once the part is cut off, the Counter Spindle.1 goes back to its home position in Setup3 with the part.
- In Setup3, the Counter Spindle.1 is attached and visible.
Our three Setups look as follows:
![]()
Create the Initial Condition
You can create a Part Sequencing activity to define the initial condition of the machining process.
Click
 NC Machine Control.
The Part Sequencing dialog box appears.
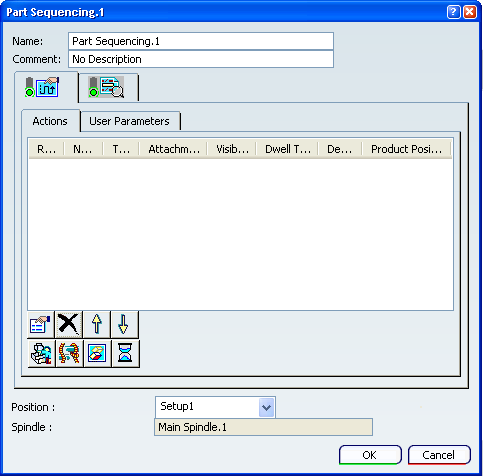
See Actions for the description of the icons.
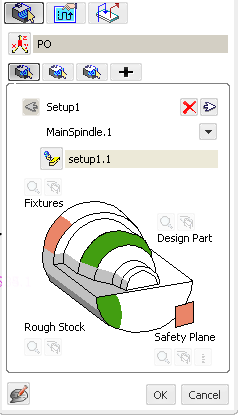
Define the initial conditions:
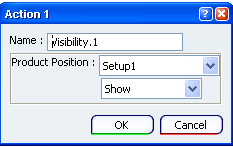
- Click
 : Visibility. In the dialog box that appears, select Setup1 from the Product Position list, and select Show from the list below. Click OK when you are done.
- Product Position lists all the Setups available.
- The possible statuses are: Show or Hide.
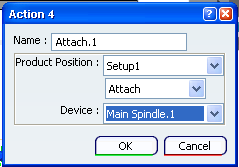
- Click
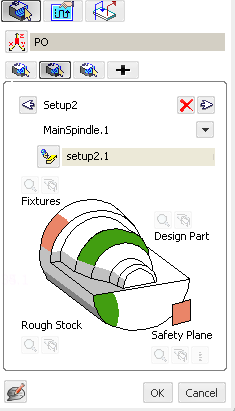
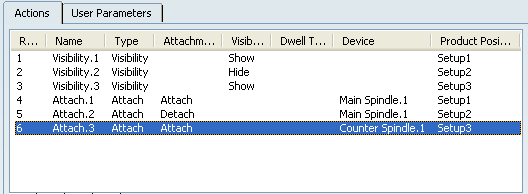
 Attachment. In the dialog box that appears, select Setup1 from the Product Position list, select Attach in the list below and select Main Spindle.1 from the Device list.
- Product Position lists all the Setups available.
- The possible statuses are: Attach or Detach.
- Device lists the spindles available.
- Create an Attachment action for Setup2 and set it Detach and Main Spindle.1, and for Setup3 and set it to Attach and Counter Spindle.1.
- Click
![]()
Create the Motion of the Counter Spindle to Grab the Part
You can create a Part Sequencing activity to define the motion of the Counter Spindle.1 to Setup1, then to Setup2 with the part attached.
Define the motion of Counter Spindle.1 from its home position to Setup1 to grab the part and go to Setup2:
- Click
 Motion
A Motion Action dialog box appears.

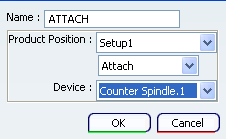
- Click OK when you are done to validate and revert to PS MOVE TO POS2 Part Sequencing dialog box.

The Counter Spindle.1 is now ready to grab (attach) the part still in Setup1.
- Click Attachment.
- In the dialog box that appears, rename the attachment to ATTACH. Select the Counter Spindle.1 from the Device list, set its status to Attach at the Product Position Setup 1. Click OK when you are done.
The Counter Spindle.1 is now ready to move to Setup2 with the part.
- Click Motion and define this motion as explained above.
The PS MOVE TO POS2 Part Sequencing dialog box is updated:
- Click


![]()
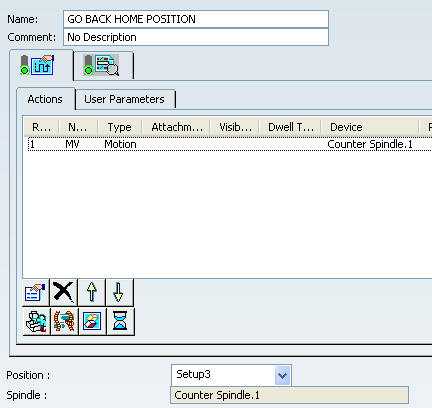
Send the Counter Spindle to its Home Position
You can create a Part Sequencing activity to define the motion of the Counter Spindle.1 back to its home position.
Click
 Part Sequencing.
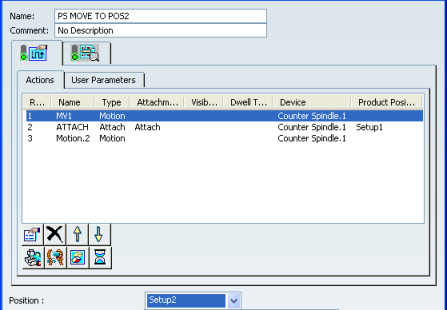
Define the motion of Counter Spindle.1 from Setup2 to its home position:
- Click Motion
A Motion Action dialog box appears.
- Select Counter Spindle Home from the Home list.
- Click OK to validate and revert to the GO BACK HOME POSITIONPart Sequencing dialog box.
- Click
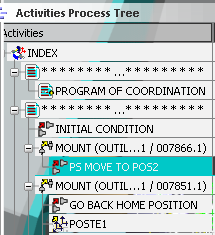
TheActivities Process Tree looks this way: