From the layout window, perform either of the following
operations:
- Select Tools > Layout View Filters...
to create a new filter.
- Right-click one or several views from the geometry
area or from the specification tree, and select Filter > Layout
View Filters... to create a new filter for this (or these)
view(s).
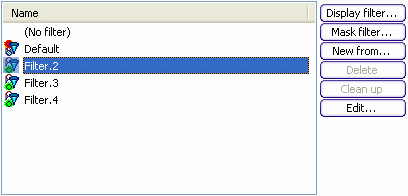
The Layout View Filters dialog box is displayed,
enabling you to create filters. Refer to
Layout View Filters Dialog Box for more information.
Click Display filter....
A display filter is created and the Edit Filter
dialog box is displayed to let you edit the filter. Refer to
Edit Filter Dialog Box
for more information.
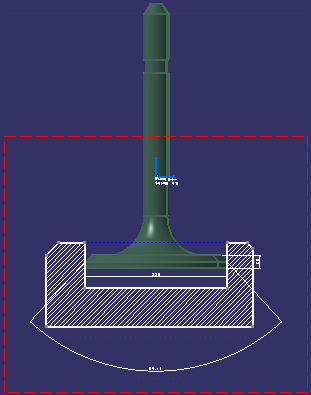
For the purpose of this scenario, you will define a filter that prevents
Partbody from being selected using its 3d background and that dims it.
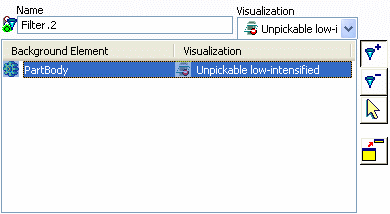
Select the Unpickable low-intensified visualization type
and make sure the Add mode is active.
Select PartBody in the specification tree.
PartBody is now added
to the filter and the Unpickable low-intensified visualization
type is applied to it.
Click OK to validate and exit the Edit
Filters dialog box.
Optional: Create other filters.
Back in the Layout View Filters dialog box,
select the newly-created filter and click Apply.
Click OK.
The dialog box is closed and the newly created filter
is applied to the front view. Note that you cannot select the PartBody
via the 3D background and that it is displayed using a dimmed color.