Modifying a Table

You can modify a table by performing typical editing operations such as adding or deleting rows or columns, resizing rows or columns, inverting rows or columns and so on.

For more information about configuring table settings, refer to Annotations and Dress-Up.

This task shows you how to:


Before you begin: Create a table.
Related Topics
More About Modifying a Table
Creating a Table
Splitting a Table
Border Tab

Reorganize a Table

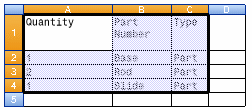
You can reorganize a table or its contents by means of inverting rows or columns, extending a table, transposing a table, inserting or deleting rows or columns and so on.

  1. Double-click the table to switch it to edition mode.


    Important: You cannot move a table while it is in edition mode.

    While in edition mode, you can:


    • Select columns (or rows) by clicking above the column (or next to the row) when the symbol appears.

    • Select or multi-select cells.

    • Leave edition mode by clicking outside the table.

    Tip: To select or multi-select cells faster, use the following keys:
    • Directional arrow keys: Up, Down, Right, Left.
    • Home: brings the selection to a cell in the first column of the table.
    • End: brings the selection to a cell in the last column of the table.
    • PageUp: brings the selection to a cell in the first row of the table.
    • PageDown: brings the selection to a cell in the last row of the table.
    • Multiple cell selection is possible with Shift + above mentioned four keys (Home, End, PageUp and PageDown).

  2. Click the top-left corner to select the whole table, then right-click to display the contextual menu.

  3. From the contextual menu, select an action:

    Command Result
    Invert rows

    Invert columns

    Transpose table

    Extend table...

    Select this command to display the Extend table dialog box, then enter the number of columns and/or rows you want to add.


    Modify properties (refer to Border Tab) Lets you modify the properties of the table.
    Important: A table cannot contain more than 10 000 cells (for example: 102 columns and 98 rows).

  4. Select a row and then right-click to display the contextual menu.

  5. From the contextual menu, select an action:

    Command Result
    Insert row(s) above Inserts a row above the selected row.
    Delete row(s) Deletes the selected row.
    Clear content Removes the content of the selected row.
    Clear format Removes all formatting applied to text in the selected row.
    Split table (refer to Splitting a Table) Splits the table.
    Row height Lets you specify the height of the selected row.
    Properties(refer to Border Tab) Lets you modify the properties of the table.

  6. Select a column and then right-click to display the contextual menu.

  7. From the contextual menu, select an action:

    Command Result
    Insert column(s) to the left Inserts a column to the left of the selected column.
    Delete column(s) Deletes the selected column.
    Clear content Removes the content of the selected column.
    Clear format Removes all formatting applied to text in the selected column.
    Column width Lets you specify the width of the selected column.
    Properties(refer to Border Tab) Lets you modify the properties of the table.
    Important: The text style used for newly-inserted cells is based on the text style of the first character in the preceding cell (upper cell for a row, left cell for a column).

Resize Rows/Columns

You can change size of rows or columns.

Three methods are available.

Note that in case of a multi-selection, all columns/rows are resized identically.

Important: The minimum value for a column width is twice the value of the horizontal margin of the cells. By default, this horizontal margin is valued 2mm.

Contextual menu

Contextual menu appears when you right-click a table. It displays number of commands.

  1. Select or multi-select rows or columns.

  2. Right-click to display the contextual menu.

  3. Select Column width... The Column width dialog box appears.

  4. Enter a number then click OK.

Cursor

Point to any edge of the column. When the pointer changes to a double-headed arrow, you can drag to resize the column.

  1. Select or multi-select rows or columns.

  2. Drag one of the borders of this selection using your cursor .

    Press Shift for more precision.

    Tip: When a column or a row is resized, the table size is modified accordingly. To keep the table size constant, press Ctrl when resizing a column/row.

Autofit

Automatically resize columns to fit the contents of the cells.

  1. Select or multi-select rows or columns.

  2. Double-click the right border of the selection in the header. This automatically fits the column size to the largest text.

Move Rows/Columns

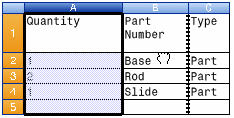
You can move rows or columns in a table.

  1. Select or multi-select rows or columns.

  2. Position your cursor on the border of the selection, then drag the selection to its new position.
Merge/Unmerge Cells

You can combine two or more table cells located in the same row or column into a single cell. You can also separate or unmerge a merged cell.

  1. Multi-select cells and choose Merge from the contextual menu.

    Important: You cannot merge a cell that has already been merged.

  2. Select this new cell formed by the two cells you merged and choose Unmerge to split them in two cells again. You can also multi-select several group of merged cells and unmerge them.

Insert a View Representation

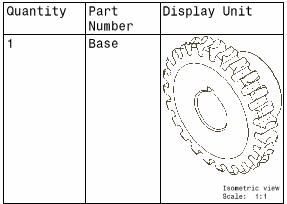
You can insert a view representation in a table cell.

Important: This command is not available with the 2D Layout for 3D Design workbench.

  1. Double-click the table to switch it to edition mode.

  2. Right-click the cell you want to fill.

  3. Select Insert > View representation from the contextual menu.

  4. Choose the view you want to insert by clicking the view in the drawing or in the tree.

    Important:
    • You cannot select the view containing the table.
    • The view must be in the same drawing.
    • If you modify the 3D part and update the drawing, the view in the table will be updated as well.

    The view is inserted in the table, and it is resized so as to fit the cell. You can resize the cell if you want to enlarge the view in the table.


Edit Text

You can edit text using the full edition mode or the quick edition mode.

To switch from one mode to the other, press F2.

Full edition mode

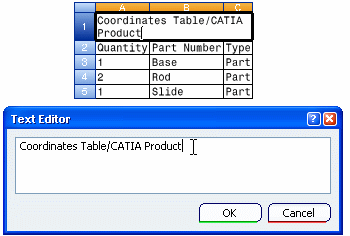
Full edition mode allows you to modify the text from the dialog box.

  1. Double-click a cell.

    The Text Editor dialog box appears.

  2. Modify the text from the dialog box.


  3. If needed, use the directional arrow keys (Left, Right, Up, Down) to move the cursor into the text.

  4. Click OK (or press Enter) to validate.

Quick edition mode

Quick edition mode allows you to enter the text directly in a cell.

  1. Select a cell.

  2. Type your text in this cell.

    The Text Editor dialog box appears, but you don't need it in a quick edition mode. (If you want to switch to a full edition mode, click inside or press F2).

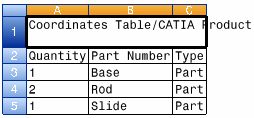
    Important: To improve performance, the table is not recomputed when using the quick edition mode, even if the Recompute table when editing cell option is selected (from Tools > Options > Mechanical > Drafting > Annotations and Dress up tab). It means that when typing a text longer than the column size, the text is displayed outside the column. After validation, the text is resized to fit the cell width, the cell height is resized to fit the text length.

  3. To validate your text:


    • Press Enter
    • Press a directional arrow key (Left, Right, Up, Down) to access the next cell.