Creating, Redefining, Selecting Segment Offsets | |||||||
|
| ||||||
Redefining the Offset to a point on a part
This shows you how to redefine the offset to a point on a part.
Click Inserts a new Offset
 .
.Select the Right Hand.

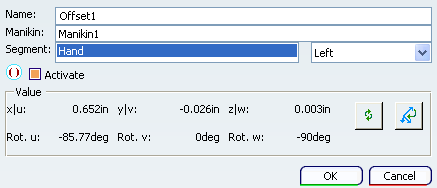
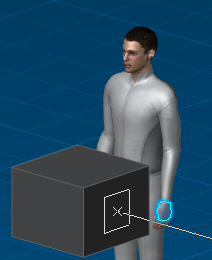
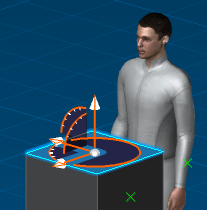
The Offset Definition dialog box appears and the graphic manipulator snaps to the hand.
Place the graphic manipulator at the front of the box.
This is the desired location for the inverse kinematics.
Click OK.
The Offset is now transferred from the hand to the box.
![]()
Redefining the offset to a point on the skin
Redefining the offset to a point on the manikin skin.
Select the desired segment.
For this example, the forearm and the offsets node.
Using the handle, drag the graphic manipulator to the desired point on the skin surface of the forearm.
Click OK in the dialog box.

Click Reach (position only)
 from the Manikin Posture toolbar.
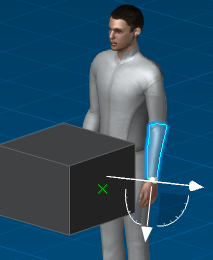
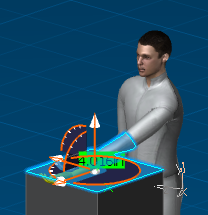
Select the top of the box.
The graphic manipulator snaps to the top surface of the box.
Select the manikin's forearm.
The forearm's offset point reaches the graphic manipulator point.
Note: When editing the offset of any segment, the graphic manipulator is automatically placed at the current offset location. The default offset location is the end point of the segment being edited.
![]()
Selecting the Active Offset from Multiple Offsets
The Offset command is used to redefine the behavior of the reach mode. Create multiple offsets and switch between them to try different scenarios.
Click on Offsets to expand the tree.
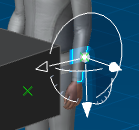
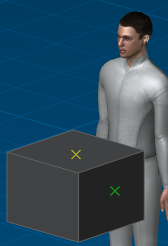
In this scenario there is two Offsets.
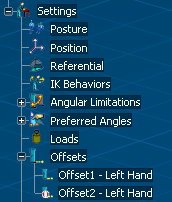
There is two X's on the box.
Note: The Offset1 is activated (green color), and Offset2 is deactivated (yellow color). It is also possible to hide/show the offsets, either by selecting the offsets one by one, or all of them by choosing the father node.
Right-click Offset1 for the contextual menu.
