About the Offset Definition and the Dialog Box | |||||
|
| ||||
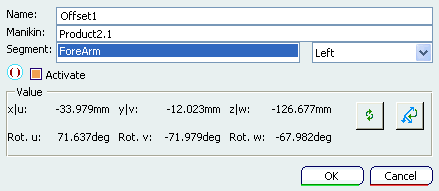
In redefining the offset, the graphic manipulator may be also be snapped to manikin skin points. Thus, the subsequent reach operation is resolved from the skin rather than the central point of the segment. There is the possibility to create multiple offsets for the same segment and to decide which one is the active offset at the current time. This is useful mainly in the manufacturing scenarios where the manikin is taking care of multiple tools within a same simulation or workstation. Each tool can then have its own offset specified on the manikin's hand.
If required, you have the possibility to create multiple offsets for the same segment and to decide which one is the active offset at the current time. This is useful mainly in the manufacturing scenarios where the manikin is taking care of multiple tools within a same simulation or workstation. Each tool can then have its own offset specified on the manikin's hand.
This point is linked to the segment and is used as an offset. If the segment selected is the pelvis (phantom segment), you are able to set an offset directly on the H-Point location. Offsets have a 3D representation in the 3D window. The hide/show command, as well as the name and color edition in the properties command of the contextual menu are available.
Also, this modifies currently existing functionality: redefinition of offset. An old file loaded into the new version of the program creates an offset and automatically activates where the old redefined offset was. Also, these offsets can be saved and loaded in the catalog.
