Creating an Offset Section View/Cut | |||||||||
|
| ||||||||
Click Offset Section View
 or Offset Section Cut
 in the Views toolbar (Sections sub-toolbar).
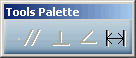
The Tools Palette is displayed with only offset constraint:
Click to create the first point of the profile.
The Tools Palette is displayed with the following constraint options:
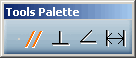
You can select any one of these constraints, Parallel, Perpendicular, Angle or Offset.
Important: Parallel, perpendicular and angle are all directional constraints while an offset is a positional constraint. Refer to About Constraints Available in Tools Palette for more information. To set the direction of the profile, select one of the following valid reference element:
-
A generated line, such as an edge, a center line or an axis line. In this case, the constraint will be associative to the referenced 3D geometry.
- A generated circle. In this case, the constraints will be associative to the 3D.
-
One of the coordinates axis of the sheet. In this case, the constraint will not be associative to the 3D.
-
A sketched line. In this case, the constraint will not be associative to the 3D.
Tips: - Selecting a constraint keeps the Tools Palette hidden, as long as the second point of the current line is not created.
- The selected constraint is not applied if you select the reference element either a 2D point (in this case, the profile segment goes through this point), or a 2D circle (in this case, the coincidence constraint is applied and the profile segment goes through the center of this 2D circle).
- If you are not satisfied with the profile you create, you can,
at any time, use Undo
 or Redo
 .
Note that
Smartpick assists you when creating this profile. Refer to Sketcher User's Guide: Using Smartpick for more information.
.
Note that
Smartpick assists you when creating this profile. Refer to Sketcher User's Guide: Using Smartpick for more information. - Once the profile is created, the constraints associated can be deleted in edit mode but cannot be modified nor recreated unless you recreate the whole profile.
- In case the 3D geometry to which the profile is associative is deleted, then the profile is still available, but is not associative and the constraint is shown in edit mode.
- In case the section view is isolated, all the profile constraints are lost.
- You can select a cylindrical surface, which is projected as a 2D edge, as the reference element for applying a section constraint. In this case, the constraint is always applied to the axis of the selected cylindrical surface.
The section plane appears on the 3D part and moves dynamically on the part.
-
Double-click to end the cutting profile creation.
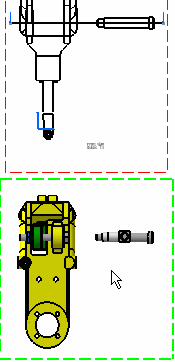
When creating an offset section view, remember that positioning the section view using the cursor amounts to defining the section view direction. The cutting profile is hole associative.
Click to define the section view direction and to position the view on the sheet.
Even when the view is generated, you can edit and modify the section profile. To do this, double-click this profile and either invert or replace it.
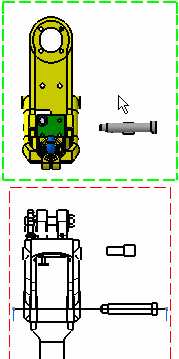
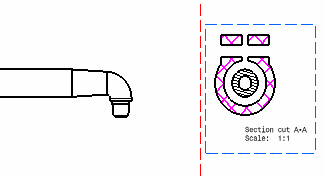
Important: In the case you were creating an offset section cut: remember that positioning the section cut using the cursor amounts to defining the section cut direction. The cutting profile is associative to the hole. In this case, select a circular edge as shown in the example below. Double-click when you are satisfied with the position of the rotating profile that automatically appears on the 3D view.
Click to define the section cut direction and to position the view on the sheet.
Important:
|