Creating a Boss | ||||||
|
| |||||
Click Boss
 in the Functional Features toolbar.
 The Boss dialog box appears.
Select the closed profile.
Tip: If no profile is defined, clicking Sketcher  enables you to sketch the profile you need. See also
More about Bosses.
enables you to sketch the profile you need. See also
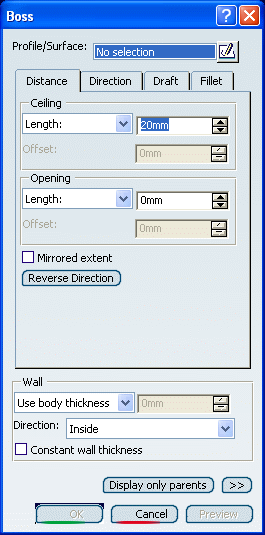
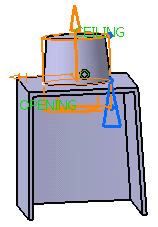
More about Bosses.Enter values in the Ceiling and Opening Length box.
The Ceiling box allows you to define the distance from the sketch plane up to the ceiling. The Opening box allows you to define the distance from the sketch plane up to the opening.
Select the Mirrored extent check box to extrude the profile in the opposite direction using the same length value as the one defined for the first length.
Tip: Click Reverse Direction to reverse the extrusion direction. Another way of reversing the direction is by clicking the arrow in the geometry area. By default, Normal to profile is selected, meaning that the profile is extruded normal to the sketch plane.
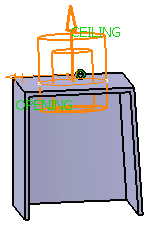
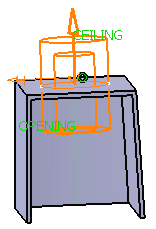
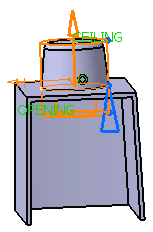
Click Preview.
The feature looks like this:
Enter 3.5mm to define the ceiling radius value.
If the boss is to be shelled, you can select the Constant wall thickness check box which propagates the fillets into the shell, thus maintaining a constant wall thickness.
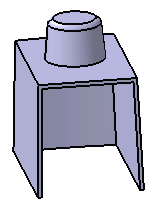
Click OK to confirm and create the boss. Boss.X is added to the specification tree in the Solid Functional Set.x node.
Outside
Inside