Shrinking Elements

You can shrink the visualization of 1D, 2D and 3D elements. Shrinking elements allows you to better visualize meshes containing mixed 1D, 2D and 3D finite elements and to better distinguish elements of different dimensions (2D elements bounded by 1D elements, 3D elements bounded by 2D elements).


Before you begin: A mesh must be created in the finite element model representation.
Related Topics
Meshing Geometries
Updating Meshes
Using the Mesh Visualization Tools
  1. To shrink the element visualization of a particular mesh, right-click a mesh in the specification tree, and select Element Shrink. To shrink the element visualization of all the meshes, click Mesh Visualization Tool or right-click Nodes and Elements, and select Element Shrink.

    The Shrink Elements dialog box or the Mesh Visualization Tool dialog box appears.

    Warning: The shrink of element visualization does not work correctly when several instances of finite element representation are loaded in session.

  2. Set the shrink coefficient for 1D elements, 2D elements and/or 3D elements using the slider. The shrink coefficient can vary from 1.00 (default value) to 0.50 (minimum value).

    The element visualization is shrunk dynamically.

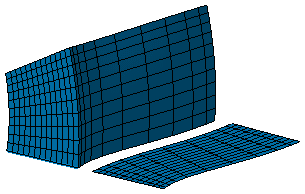
    Example of a shrink coefficient equal to 1 (no shrinking):
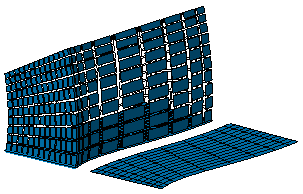
    Example of shrinking for 3D elements:
  3. Click OK.

    Important: Shrink coefficients are initialized with the values set in the Graphics tab of the simulation settings. You can customize the element shrink in the graphics settings. See Graphics.

    Every meshes are visualized with shrink options set in the settings; if you change those coefficients, those values are kept.