Editing Multi-Constraint | ||||||
|
| |||||
Edit Constraint Values
To edit the constraint value, use the Edit Multi-Constraint command.
Click Edit Multi-Constraint
 in the Constraints toolbar.
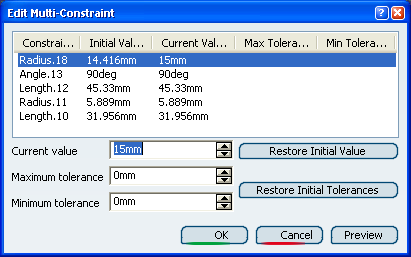
The Edit Multi-Constraint dialog box appears. It displays the whole dimensional constraints of the sketch.
Important: In case you wish to restrict the selection, that is access not all of the constraints but just a few of them, first select the constraints of interest, then click Edit Multi-Constraint . Once the dialog box is displayed, you still can add
other constraints if needed.
Select a constraint in the dialog box and enter a new value in the Current value box.
Here we enter 20mm as the new value for Radius.3.
Optionally click Preview to get an idea of the result.
![]()
Edit Constraint Tolerances
In the Sketcher, tolerances are only displayed but are not taken into account when solving dimension values. Tolerance values displayed in the Sketcher can be managed by the 3d Functional Tolerancing and Annotations product, which is dedicated to tolerance management.
Click Edit Multi-Constraint
.
The Edit Multi-Constraint dialog box appears.
Select the constraints for which you want to set tolerances and enter a new value in the Maximum tolerance and Minimum tolerance boxes.
Important: You can also add a tolerance directly from the geometry area. Double click the constraint and select Add tolerance in the contextual menu. Click OK.
The tolerances are displayed on the sketch with the corresponding dimension.