Fixing Elements Together

You can attach sketcher elements together by using the Fix Together command. This capability lets you constrain a set of geometric elements even if constraints or dimensions are already defined for some of them. Once constrained, the set is considered as rigid and can be easily moved just by dragging one of its elements.

This task shows you how to use the Fix Together command to make two elongated holes perpendicular and position them inside a rectangle.

One of the interests of this capability is that it also allows you to make 2D kinematics studies in the Sketcher.


Before you begin: Create a rectangle and two non-constrained elongated holes outside the rectangle.

Prior to using Fix Together, consider the following scenario: to make both elongated holes perpendicular to each other, you could be tempted to select one oblong hole then drag it next to the second one, and eventually set a perpendicular constraint. The fact is that setting the constraint if no other constraints are set, deforms the holes. To quickly achieve the desired geometry, follow the steps as explained below.

Related Topics
More about Fixing Elements Together
  1. Select one elongated hole by using the selection trap.

  2. Click Fix Together in the Constraint toolbar.

    The Fix Together Definition dialog box appears displaying all selected geometrical elements.

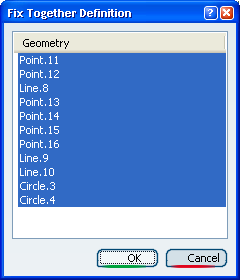
  3. Click OK to confirm.

    The Fix together constraint is created as indicated by a green paper clip symbol.

  4. Repeat the operation for the second elongated hole. Just to check that you can now manipulate each hole by keeping its rigid body.

  5. Select them and drag them to any location.

  6. Set the perpendicular constraint.

  7. To position both holes inside the rectangle, delete the constraints you previously set.

  8. Create only one Fix Together for both holes.

  9. Drag the holes all together inside the rectangle after selecting any of their geometrical element and add constraints between the rectangle and the holes to specify their exact positions.

  10. Select the Fix Together constraint attaching the holes and use the Fix-Together.xxx object > Deactivate. Note that if the Fix Together constraint is deactivated, the geometric elements are always seen by the application as belonging to a rigid set. So selecting them remains impossible for defining another Fix Together constraint. You can now modify the shapes of the holes as the constraint is deactivated.

  11. Enlarge the right hole.

  12. Note that passing the cursor over an activated or not Fix Together constraint highlights the associated geometry.