More about Fixing Elements Together | ||||
|
| |||
Select Geometrical Elements
You can select as many geometrical elements as you wish. You can select the origin, the H or V Direction of the sketch absolute axis. To assume that the rigid body behavior can be managed, by default the application includes element dependencies.
Dependencies
To assume that the rigid body behavior can be managed, by default the application includes element dependencies. When adding a spline for instance, all its control points and control point tangencies are automatically added even if they were not selected.
The following table lists geometric elements and their corresponding dependencies:
| Geometrical Element | Dependency |
|---|---|
| Line | Start point + End point |
| Circle/Ellipse | Center point |
| Arc of Circle/Ellipse | Enter point + Start point + End point |
| Parabola/Hyperbola | Start point + End point |
| Conic by two points | Start point + End point + (Start Tangent curve + End Tangent curve) or Tangent Intersection point + (Passing point or Not) |
| Conic by four points | Four points + One Tangent curve |
| Conic by five points | Five points |
| Connect Curve | First point + Second point + First curve + Second curve |
| Spline | Control points + Tangent directions |
| Important:
From R14 to R17 the Add/Remove Dependencies option was
available to allow the creation of complex fix together sketch
scenarii. You can still revert to a fix together with all its
dependencies. To do so, refer to the Analyzing Sketched Geometry chapter of this guide. |
Number of Elements
You can select as many geometrical elements as you wish, but just remember that a geometric element can be used by only one Fix Together constraint.
Whenever you wish to remove elements from the selection, just right-click the element of interest and select Delete. Alternatively, just select the element in the geometry area again.
Absolute Axis
You can select the origin, the H or V Direction of the sketch absolute axis.
These three elements cannot be selected at the same time by a selection trap. You need to explicitly select them one by one.
Edges Obtained Using Offset, Projection or Intersection
A rigid set including edges obtained via Offset, Projection and Intersection operations and sketched geometry remains rigid as long as you do not move the initial 3D geometry.
To ensure permanent rigidity, apply Isolate to the edges obtained by Offset, Projection and Intersection operations. This will break the links between the original 3D geometry and the edges.
![]()
Degrees of Freedom
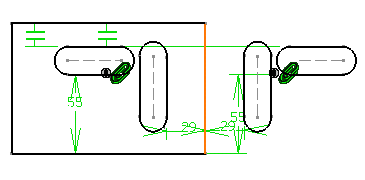
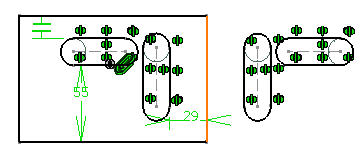
The set of geometric elements constrained by Fix Together has three degrees of freedom whatever the number of elements.
In order to be fully defined, the set needs to be dimensioned to fix geometry taking up at least the three degrees of freedom (one rotation and two translations).
A geometric element included in a set of elements constrained
via Fix Together  can also be constrained using
Constraints Defined in Dialog Box
can also be constrained using
Constraints Defined in Dialog Box  . If, for instance, a FixTogether constraint contains a fixed line, the set of
geometric elements has one single degree of freedom which is along
the direction of the line.
. If, for instance, a FixTogether constraint contains a fixed line, the set of
geometric elements has one single degree of freedom which is along
the direction of the line.
![]()
Edit a Fix Together Constraint
You can add a geometric element to a Fix Together constraint provided it belongs to the current sketch and is not already included in another FixTogether constraint.
The selection or the pre-selection of the elements to add depends on this verification during the FixTogether constraint creation and editing.
You can add several elements at the same time either by using the CTRL key or the selection trap. After a selection:
- Geometric elements not used for the definition are added
- Geometric elements that are already part of the definition are removed.
![]()
Additional Constraints
No constraints are solved between geometric elements linked by the same Fix Together constraint, except for Fix constraints.
- Adding constraints between elements involved in a FixTogether constraint and other elements involved too in a distinct FixTogether constraint or free elements allows you to position the fixed together set.
- Adding a constraint to a fixed together element brings about an over-constrained system. But unlike other types of constraints, when exiting the Sketcher, the application does not detect no inconsistency.
- All existing or added constraints on geometric elements of a FixTogether constraints are seen as over-defined (in purple when solving status is displayed).
Except for Fix constraints, no constraints are solved between geometric elements linked by the same Fix Together constraint. However, no update error appears on such over-defined constraints (between Fixed Together geometric elements) and the part is successfully updated.
![]()
Remove Geometrical Elements
You can remove geometrical elements from a Fix Together constraint by deleting the geometrical elements: dependencies are deleted too.
When the number of geometric elements in the set is less than two, the Fix Together constraint is NOT automatically deleted.
![]()
Apply Operations onto Fix Together Constraint
There are a few things that you need to know when applying operations onto fix together constraint.
Copy/Paste
You can copy and paste a fix together set (not the constraint alone) by right-clicking the paper clip, selecting Fix Together object > Select Geometrical Elements and then using Ctrl to include the paper clip in the selection.
You can also do so by using the selection trap to ensure that the paper clip and the associated constrained geometry are selected and applying the Copy/Paste capability.
Mirror
By switching off the Geometric constraints mode, the Fix Together constraint is taken into account like the other constraints when mirroring geometric elements and keeping the initial constraints.
...otherwise, the application creates symmetry constraints as
requested.
Break/Trim/Corner/Chamfer
You can apply the Break, Trim, Corner and Chamfer commands onto elements attached by a FixTogether constraint.
When all the geometrical elements belong to the same FixTogether constraint, the constraint is updated accordingly. For instance, when breaking a curve, the new half curve is automatically added to the definition.
![]()
Methodology
Fix Together ![]() is a way of getting better solving
performances as well as solving more complex systems including
rigid sub-parts.
is a way of getting better solving
performances as well as solving more complex systems including
rigid sub-parts.
Depending on your geometry and your needs, you will use Fix
Together ![]() or Auto Constraint
or Auto Constraint ![]() ,
bearing in mind that:
,
bearing in mind that:
- The Fix Together command creates only one constraint for a group or elements.
- The Auto Constraint
 command detects all possible constraints between the selected elements then creates these constraints. This means that sometimes you may create a lot of unnecessary constraints just for imposing a rigid behavior. For more information, see Autoconstraining a Group of Elementsin theSketcher User's Guide.
![]()
Visualizing Fix Together Constraints in the Interactive Drafting or 2D Layout for 3D Design Specification Tree
In the context of Interactive Drafting or 2D layout for 3D Design, all constraints created in a view, using the Fix Together command are added in the Fix Together Constraints node, under the appropriate view node in the specification tree. (Constraints created directly in the sheet or the sheet background are not displayed in the specification tree.)
The Fix Together Constraints node is created by default when one or more elements are fixed together using the Fix Together command, but it is not displayed by default. At any time, you can specify whether or not you want to view this node in Tools > Options > Mechanical Design > Drafting > General tab, Tree area, by selecting Display features under views.