Select (or press CTRL+P).
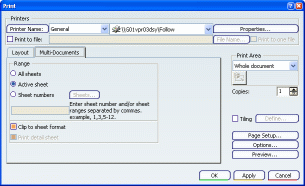
In the Print dialog box, click the Multi-Documents tab:

Optional: Select the Print to file check box then enter a file name and a folder (e.g. e:\users\test.prn) or,
click File Name....
This prints the object to a file instead of a printer.
Each image printout is stored in a separate
file (i.e. this generates as many .prn files as there are sheets). Each generated .prn file
must be printed individually.
Optional: Select the Print to
one file check box to print all your sheets to a single file.
This check box is relevant when printing a document with multiple pages and with the All sheets option selected in the Multi-Documents tab.
Click OK.
In the Range area, indicate
whether you want to print All sheets or only the Active
sheet by selecting the appropriate option.
Optional: If you clicked
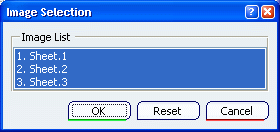
Sheet numbers, click Sheets....

In the Image Selection dialog box, select the sheets to be printed.
Note:
Reset lets you re-select all the sheets
displayed, if needed.
Click OK.
Optional: Click Preview
to display a preview of the object to be printed.
Click Options... to define the color, banner and rendering options of your choice.
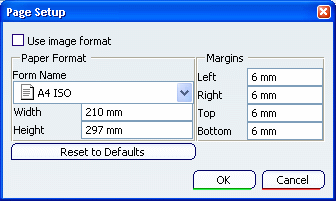
Click Page Setup....

In the Page Setup dialog
box, define the paper format and margins.
Optional: Select the Use image format
check box.
The No fitting (in
the Position and Size area under the Layout tab)
option is automatically activated so that the document is printed to its original size.
In the Print dialog box, the value User
appears as the current document format and any further
interaction defining the position, size and layout of the image
to be printed is disabled.
Optional: If you print to a
3D PLM printer, you can click Properties...
to access the printer properties.
Click OK or Apply + OK.
The dialog box is closed and the object is printed.