Editing Fasteners Graphic Properties | |||
| |||
Right-click the fastener in the specification tree or in the 3D area and select Properties.
The Properties dialog box opens.

Tips: - By default, only the Show Symbol and Show Shape options are selected.
- Clicking Set All lets you select all the options; conversely, clicking Default Properties lets you restore the default properties (i.e. Show Symbol and Show Shape options are selected).
Click Apply.

Click Apply.

Now clear the Show Shape option and select the Show Fastener Axis Orientation option:
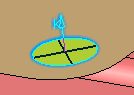
The visualization of the K axis depends on the option defined in Tools > Options > Shape > Automotive BiW Fastening > Display tab. By default, the K Axis Display Only option is selected.
Click OK to apply the new graphic properties.
Important: The 3D fastener visualization depends on the fastener graphic properties and display options defined in Tools > Options > Shape > Automotive BiW Fastening > Display. - If the graphic symbols (symbol and color) are already assigned to a Zone Count or Process Type (for the symbol) or a Process Category (for the color) in Tools > Options > Shape > Automotive BiW Fastening > Display, they cannot be modified in the Properties dialog box. In that case, spinners are grayed.
-
Conversely, if the graphic symbols are assigned to Unspecified,
you are able to modify them using the combo box.
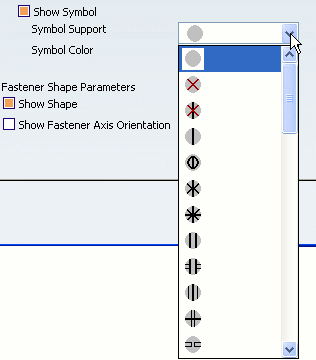
Modifying the Symbol Support
 Modifying the Symbol Color
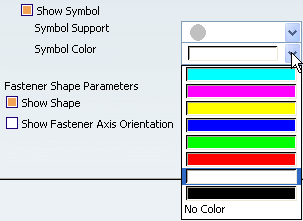
Note: For further information, refer to Display.