Adding and Editing Datacards and Datacardgroups | |||||
|
| ||||
Add and Edit a Datacard
You can create and edit a datacard using the Add and Edit buttons.
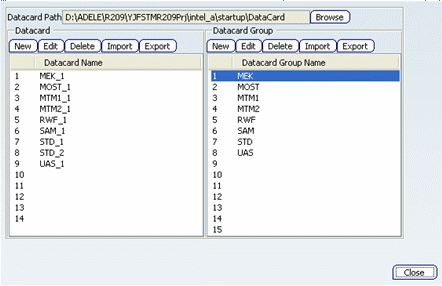
Click Open Datacard Administration
 .
.In the Datacard area, click the New button.
The New Datacard dialog box appears.
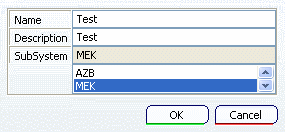
Enter a Name, Description and Subsystem in the dialog box.
A datacard file with the same name is created in the Datacard path folder and the Datacard name list is updated.
Select the "Test" datacard and click the Edit button.
The Datacard Editor dialog box appears.
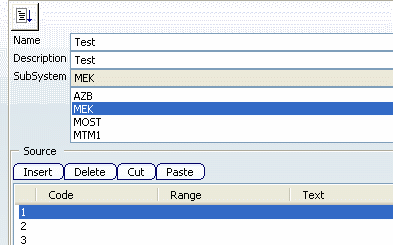
Enter the following values in the source multi-list.

Note: The Datacard Editor dialog box also includes the following buttons for managing the source of the datacard:
- Insert: Select a line in multi-list and click this button: an empty line is inserted above the selected line.
- Delete to delete a line in the multi-list.
- Cut and Paste to cut and paste a given line from one row to another.
The preview of datacard appears.
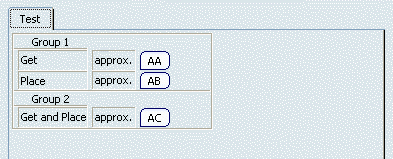
Verify each code in the datacard.
The various codes are represented as follows:
Note that there is no combo box displayed next to AB.
Click Close
 .
.
 .
.
![]()
Add and Edit a Datacardgroup
You can create and edit a datacardgroup using the Add and Edit buttons.
Click Open Datacard Administration
.The Data Card Administrator dialog box appears.
Enter a Name and select a Subsystem in the dialog box.
A datacardgroup file with the same name is created in the Datacard path folder and the Datacardgroup name list is updated.
Select the "Test" datacardgroup and click the Edit button.
The Datacardgroup Editor dialog box appears, allowing you to edit a datacardgroup.

Select both the datacards in the Available Datacards list and click the
 button to include these datacards in the datacardgroup.
Click Close
.
