Applying a 3D Alternate Vein Texture | |||||
|
| ||||
Select the Texture tab then select Alternate Vein in the Type list.
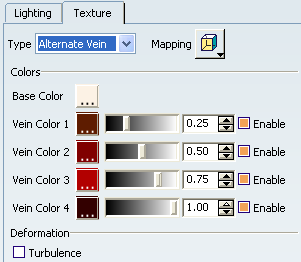
This texture creates an interpolation by alternating up to 4 vein colors. In the above dialog box, each color square represents a vein. Alternate Vein texture differs from Vein texture since it interpolates the colors of complete veins (and not half-veins as for Vein texture).
When a 3D texture is selected, the corresponding texture image is projected onto the object in the geometry area so that you can get a better idea of the final result:
However, note that:
- the projected image does not reflect exactly what you get when rendering the image
- the texture has a low resolution in order not to deteriorate performance and as a consequence, the image projected onto the object may sometimes be pixelated.
Warning: You can also choose a mapping type but do not forget that this mapping is relevant for real time display only, it has no impact when computing the rendered image.
The two images below compare the different results
you can obtain using a standard texture and a 3D texture of type
Alternate Vein:
| Rendered image with standard texture | Rendered image with Alternate Vein |