Routing a Branch from and to a Pipe

You can create a pipe by branching it from an existing pipe.

This task shows you how to:


Related Topics
Placing a Part in Space
Selecting a Part

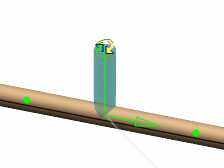
Create a Branch from a Pipe

You can create a branch from a pipe.

Open the document with the pipe to which you want to route a branch.
  1. Click Rigid Route in the Compass Toolbar.

    The 3D Part / Product DS appears.

  2. Enter details and click Finish.

    The balloon opens.

  3. Click Select > Branch in the balloon.

  4. Click the pipe at the location where you want to branch the other pipe.

    The branch is created.

  5. Use the orientation and offset manipulators to orient or move the branch.

  6. Click Commit to validate the position.

    The Table Browser dialog box opens to let you choose the pipe reference and the turn rule you want to apply to the branch.

  7. Click OK.

    The branch is created.

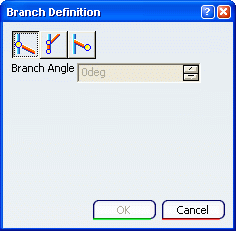
Create a Branch to a Pipe

You can create a branch to the pipe by using the Curve Branch option in the Branch Definition dialog box.

  1. Click Rigid Route in the Compass Toolbar

    The 3D Part / Product DS appears.

  2. Enter details and click Finish.

    The balloon opens.

  3. Click Select > Port in the balloon.

  4. Select a port on a part to start creating your pipe.

    The Table Browser dialog box opens to let you choose the pipe reference and the turn rule you want to apply to the branch.

  5. Click Select > Branch in the balloon.

    The Branch Definition dialog box opens.

  6. Select the type of branch you want to create.


    • Flexible Branch: allows you to define the angle.
    • Curved Branch: allows you to define a straight distance and a reverse direction.
    • Rigid Branch: allows you to define an angle and an offset.

  7. Click the pipe segment at the location where you want to branch.

    A blue line represents the pipe before being created.

  8. Click OK to place the branch.

    The branch is created according to the parameters you chose.