Creating a Rigid Branch to a Pipe | |||||
|
| ||||
Click Rigid Route
 in the Compass Toolbar.
The 3D Part / Product DS dialog box appears.
Select Insert Point
 > Select Point
  .
. 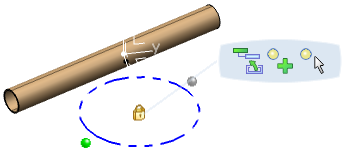
In balloon, choose Select
 >
Branch
>
Branch  .
.
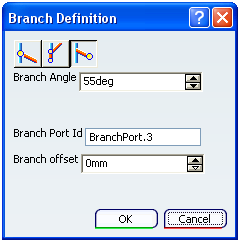
The Branch Definition dialog box appears.
Note: All the boxes in the Branch Definition dialog box are unavailable.
Select a point on the run.
Direction line is drawn mentioning an angle.
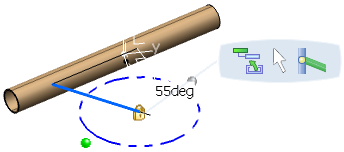
Also, all parameters are initialized and displayed in the Branch Definition dialog box.
 .
.The rigid branch is created.
Note:
You can insert an olet at the rigid branch node using the Place on Port or Node  option. For more information, see Placing a Part on Port or Node.
Tip:
To modify rigid branch port parameters:
|
 in the