Defining a Part

You can assign and modify values for a part's attributes, including the sub-part type.


Before you begin: Open a document and place this part, and launch Fluid Systems Part Design.
Related Topics
About Creating Parts and Equipment
Assigning Port Attribute Values
  1. Click Typed Part in the Technological Behavior toolbar.

    The Typed Part dialog box appears.

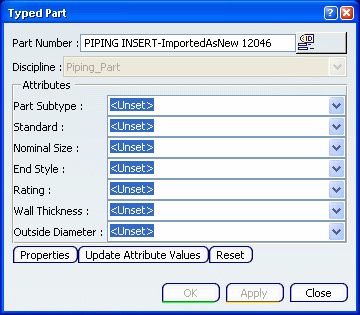
  2. Make your selections in the attribute lists.

    Note: The values shown in the lists depend on the standard you select. When you change to a different standard then affected values, such as nominal size, are unset and you will have to select them again.

  3. Click Properties to change some general values and graphic properties.

    Properties dialog box is displayed.

  4. Click Update Attribute Values.

    Note: The Update Attribute Values button is available when a port attribute has been defined.

    Update Attribute Value dialog box is displayed.

    Tip: You can change the order in which the value displays in the Build Part dialog box. To do this, select a port and use the Up and Down arrows. (See example below.)

    If more than one port has the same nominal size (or other attribute value) then it does not display more than once. For instance, in the example above, if there was a third port with the nominal size 1/2 inch, you would still see 1/2in X 1/4in, and not 1/2in X 1/4in X 1/2in.

  5. Click OK to finish.

    Important: The part displays the attribute value defined for the port, if it is different from the value defined for the part. This usually happens when a part has more than one port and a different value (such as for nominal size) is defined for each port.