Open the PRM workbench; click .
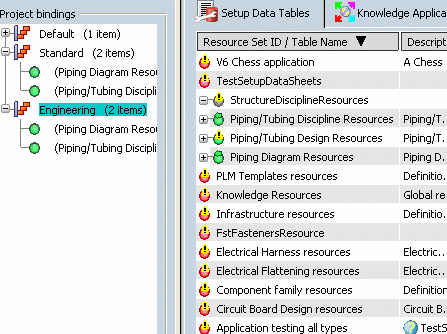
The Project Resource
Management Editor appears. The left frame displays a list
of all the projects with bound resource sets. The right
frame displays the resource sets for various applications.

In the Setup Data Tables tab:
- Right-click the resource set Piping/Tubing
Discipline Resources.
- Select Create a new Resource Table and click Finish in the dialog box.
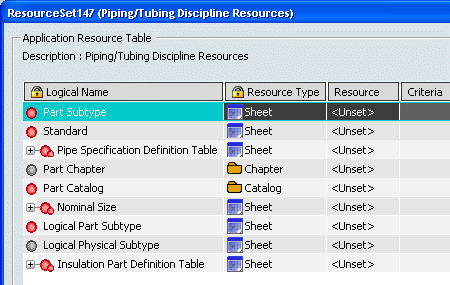
The Application Resource
Table appears. It displays the logical names of all the
required resource items. At this stage no resource files have been assigned to these items and therefore in the Resource column all entries are listed as <Unset>.

Select Part Subtype.
In the Resource
column, double-click <Unset>.
The PLM search dialog box opens.
Search for the resource file you want
to assign to this item in the resource table (see Related Topics for more information on the contents of resource tables which will help you identify the correct resource file).
Note:
If the PLM search dialog box includes a From File tab, you can import a resource
file directly using this facility. Importing the file places the data in PRM and saves the
file in the database. The From File tab is not visible when you are working with Catalog or Chapter resource types.
Select the desired resource
file and click OK.
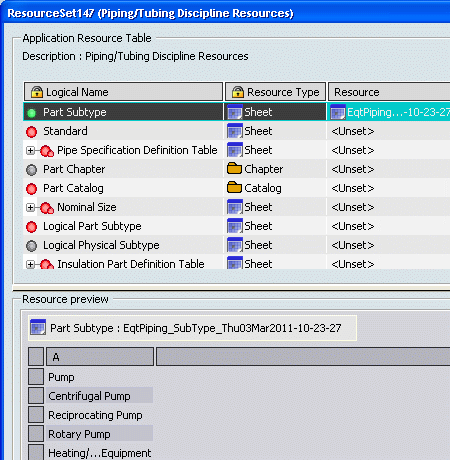
The name of the selected
resource file appears in the Resource column and the
Resource Preview window displays the data
in the file.

Repeat steps 3 to 6 until all the items in the resource table have resources assigned to them.
When finished, click OK in the Application Resource
Table dialog box.
The dialog box closes.
Click Propagate  .
.
Your changes are saved to the PLM database.
You have now finished assigning resource files to the resource table for the Piping/Tubing Discipline resource set.
The next step is to bind these resources to a project - see Related Topics.