Inserting/Creating a Human Interface | |||
| |||
Human Interfaces on Products
This describes how to add a Human Interface onto products.
The human interface product contains a human interface, which can be accessed in the spec tree. The following modes of interaction are supported:
- Action / Object: select a human interface, then a product.
- Object / Action: select a product, then a human interface.
Click Inserts a new human interface
 , then the product or a Human Interface.
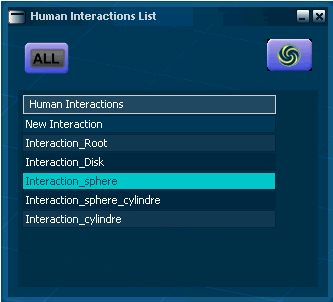
The Human Interactions List dialog box appears.
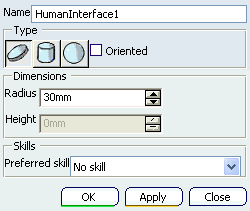
The Human Interface Editor dialog box appears.
![]()
Manikin - Setting the Human Interface
Manikin - Setting the Human Interface.
Click Inserts a new human interface
icon, select the object from the Specification
tree.
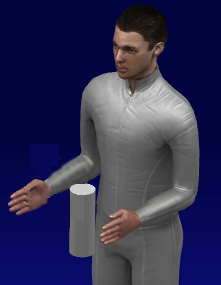
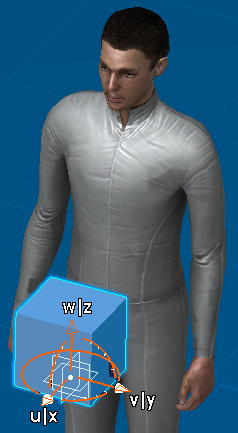
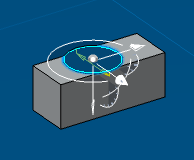
In the dialog box, select the cylinder, and activate Orientated.
Note: Notice another red cylinder appears. As you are changing the dimensions, the highlighted cylinder is changing. Zooming in shows the orientation, with the compass attached. Rotate accordingly.
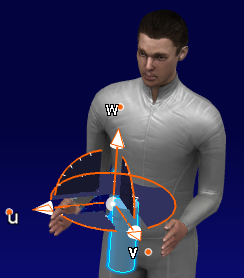
Select the Human Interactions icon. The dialog box appears.
With the Automatic Update option checked in tools options, the related manikin to the selected human interaction sees the posture automatically updated.
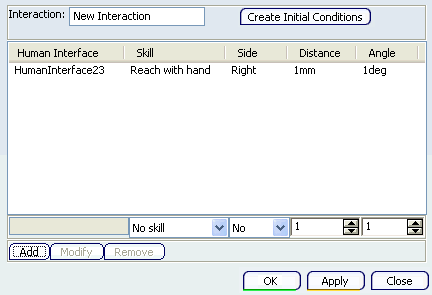
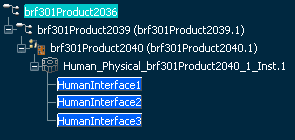
The Human interaction in the tree.
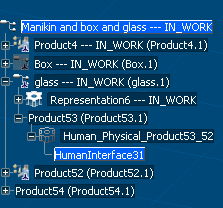
If we add three Human Interfaces to a product, this is what we see in the specification tree.
![]()
Human Interfaces with an Objects Modified Geometry
Its goal is to adapt the positioning of any Human Interface to its object's geometry. If the object's geometry is modified then the Human Interface's position must be updated towards its underlying geometry. You not have to manually update the human interfaces when related objects have their geometry modified.
When a Human Interface is combined to an object, follows the displacement (translation and rotation).
But if the object's underlying geometry is modified, then the Human Interface doesn't reconfigure its position towards its aggregating object
Through this, the Human Interface, when displayed or implied in a update Human Interaction process, recomputes its relative position to its combined object automatically.
Only human interfaces created with release 20 and greater is synchronized with its aggregating object, the human interface which created before this release won't be synchronized with the change on the attached object except it is re-attached to a new attached object.