Creating a Restricted Area

You can create a restricted area annotation.

  • A restricted area annotation allows user to define a delimited surface to be toleranced.
  • The restricting area and the restricted area may consist of several elements.
  • The surface may be defined using Generative Shape Design workbench.
  • To customize the restricted area options, see Restricted Area.

Important:

  • When a restricted area is not valid, a yellow filled circle is displayed on the icon in the Specification Tree. Right-click the restricted area in the specification tree and select Diagnostic Report from the contextual menu.
  • When the restricting restricting elements are not included in the restricted elements, a warning message is displayed.
  • You can edit a restricted area:
    • Double-click RestrictedArea.1 in the specification tree, the Partial Surface dialog box is displayed.
    • You can only select the Connection Management icons or OK or Cancel.
    • Modifications made with the Connection Management cannot be undone.


Before you begin:
  • Open an existing existing 3D shape.
  • Improve the highlight of the related geometry by selecting Highlight faces and edges in Selection.
  1. Click Restricted Area

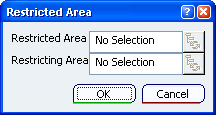
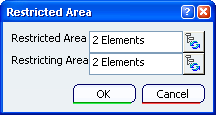
    The Restricted Area dialog box appears.


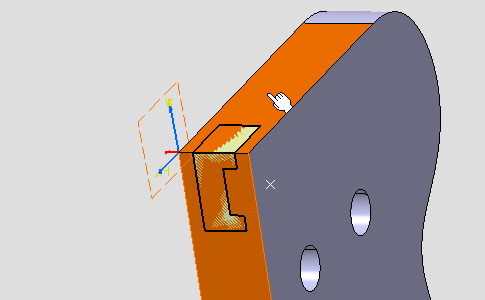
  2. Select the two restricted surfaces as shown below on the part.

    Important:
    • The 
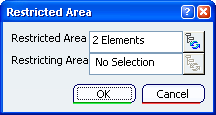
Restricted Area field is updated, the Geometry Connection Management becomes available, see Connections Management for Annotations.
    • You can use the Connection Management to add/remove/replace/rename elements of the selection and manage the impacts of these modifications.
    • You can select as many elements as you want for each area, either from the specification tree or from the graphic area. Pick an element twice to deselect it.


  3. Place your cursor in the Restricting Area field to validate the selection of the Restricted Area elements.

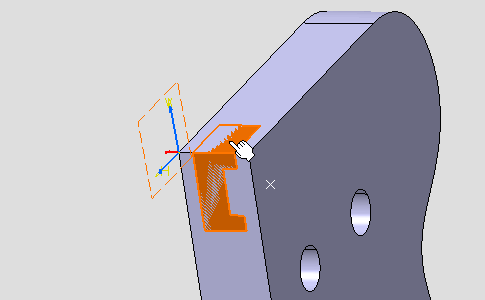
  4. Select the two restricting surfaces as shown below on the part.

    he Restricted Area dialog box is updated.


  5. Click OK to validate these selections and create the restricted area.

    The Restricted Area.1 is created in the specification tree.