Analyzing Mesh Quality | ||||||||
|
| |||||||
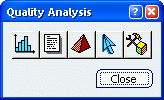
In the Mesh Checkers toolbar, click Quality Analysis
 .
.The Quality Analysis tool box appears.
Tip: To analyze the mesh quality of a particular mesh, right-click the mesh in the specification tree, and select Analyze. To display statistic curves, click Statistics Curves
 .
.The Statistic Curves dialog box appears.
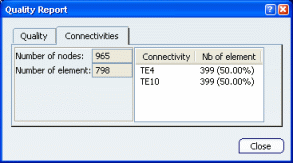
To display a report on quality and connectivity, click Quality Report
 .
.The Quality Report dialog box appears and displays:
- The number and percentage of good, poor, bad, and worst elements relatively to all the quality criteria.
- The number of nodes, number of elements, and type of elements used (connectivity).
Example:
To visualize, focus on, and browse the worst mesh elements, click Worst Elements
 .
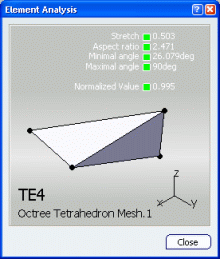
.To obtain information on a particular element, click Element Quality
 , and
select an element.
, and
select an element.The Element Analysis dialog box appears.
Example:
To change the set of criteria, click Quality Criteria
 .
.The Quality Criteria dialog box appears. You can visualize the set of quality criteria used to analyze the mesh quality.
Example:
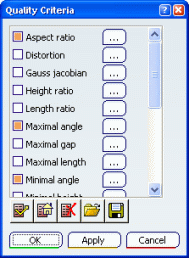
Modify the set of quality criteria.
- To select a criteria, select the associated check box.
- To know more about a criteria, click
 .
The corresponding dialog box appears.
.
The corresponding dialog box appears.
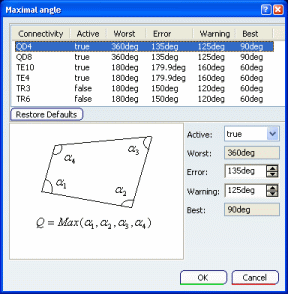
For each criterion, you can ignore a connectivity by selecting False in the Active list. You can also modify the threshold values for a connectivity: the element quality is bad if one of its quality criteria value is under or above (depending on the criterion) the Error threshold value; the element quality is poor if one of its quality criteria value is under or above (depending on the criterion) the Warning threshold value.
Example:
- To select all the criteria, click
 .
. - To restore the default set of criteria, click
 .
. - To turn off all the criteria, click
 .
. - To export and save a set of criteria in a file stored on your computer, click
 .
.The Save Quality Criteria dialog box appears. You can select an set of criteria you already created and modify it, or you can create a new set of criteria.
Important: You cannot modify the Export directory that is automatically set with the path directory specified in the simulation quality settings. To modify the export directory, see Export Default Directory. The exported set of criteria will be available in the Import Criteria List dialog box.
- To analyze the mesh quality relatively to a predefined set of criteria, click
 .
.The Import Criteria List dialog box appears and displays the list of the predefined sets of criteria.
- Three default and predefined sets of criteria are delivered along with the product. You cannot modify them. For example, the ELFINI solver uses the ELFINI_Checks set of criteria when you compute a structural analysis simulation.
- All the sets of criteria that you exported are also available.
The mesh will be analyzed according to the selected set of criteria.