Defining a Wire Extension

You can extend an existing logical component into an electrical wire.


Before you begin:
  • Create a logical reference (Electrical System).
  • Insert a logical component (Wire1) under the logical reference.
  • Create two logical ports (Port1 and Port2).
Related Topics
About Electrical Logical Systems
Creating a Wire Reference
  1. Select Electrical Wire Extension from the Electrical toolbar.

    Tip: This command is also available from the menu bar, via Insert > Extensions... > Electrical Wire Extension.

  2. From the RFLP structure tree or from the 2D representation, select a logical component.

    Warning: To be extended into a wire, a logical component must aggregate at least two ports.
    Tip: You can select a logical component before or after selecting the command.

    The Electrical Extension dialog box appears.
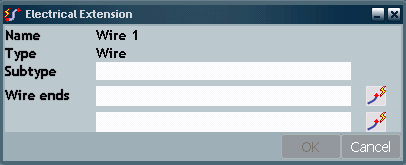
  3. Select Port1 and Port2.

    The selected ports appear in the Wire ends fields.

    Important: To modify the selection, click then select another port.

  4. If needed, enter a description in the Subtype field.

  5. Click OK to close the dialog box and add an electrical wire extension to Wire1.

    Under the system node (Electrical System), note that an Electrical node is created to store all electrical objects. In our example, it aggregates a Wires node containing the extended electrical net (Wire1).
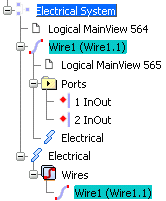


    Tip: You can minimize the 2D representation of a net by selecting 2D Graph... > > Minimize Representation in 2D Graph from the contextual menu.

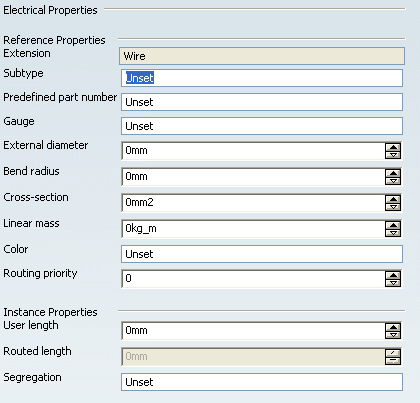
  6. Right-click the electrical component, then select Properties from the contextual menu.

    The Properties dialog box appears.

    An Electrical tab has been created to display the electrical properties.