Creating Flat Cables | |||||
|
| ||||
Create a New Flat Cable
You can create a new flat cable, retrieving the flat cable's section properties owned by the segment connection point or cavity.
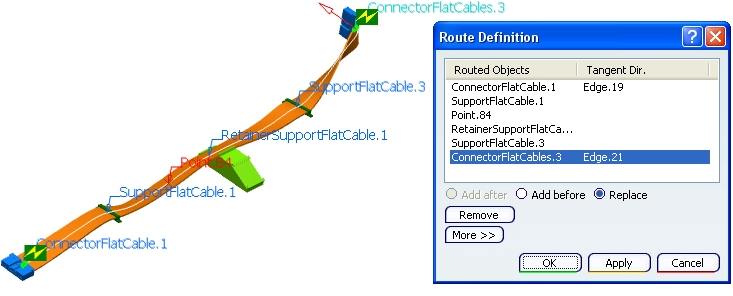
Click Branch
 .
.The Branch Definition dialog box appears.
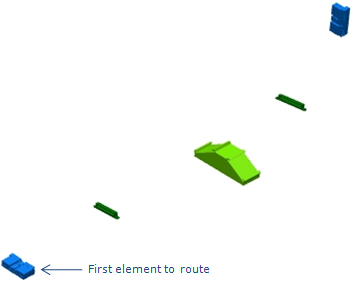
Select the first element to route. It must be the connector with section properties.
Select the other object(s) to route.
For more information about routing, refer to Electrical 3D Installation User's Guide: Routing Branches: Routing between Points, Devices and Supports.
Note:
- To obtain a flat cable, you can also convert a regular branch into a flat cable.
- Once the flat cable is routed, you can change its orientation. For more information, refer to About Orientation Management and Rotating Profiles on Segment Points.
![]()
Create a Second Flat Cable from a First One
You can create a branch and route it on an existing branch point that belongs to a flat cable. In this case, you generate it from an existing branch by routing it on a branch point that is either existing or created on the fly. The branch gets the properties of the first flat cable. In this case, you do not need any connector to create flat cables.
Select one or several routing objects (in our example, a point).
You obtain a flat cable automatically:
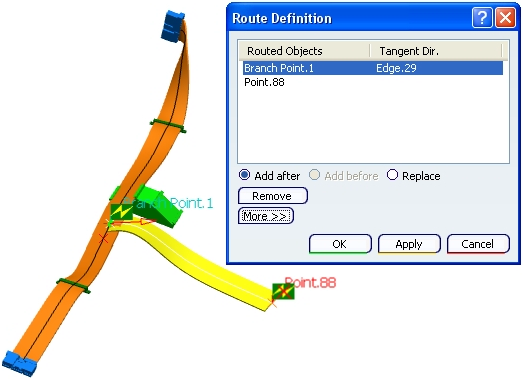
Important: - To obtain a flat cable, the branch point must be the first routed object.
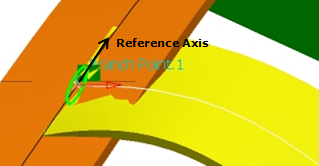
- The curve tangency (see red arrow on the image below) on the branch point is a line parallel to the existing flat cable's width direction. It means that the new flat cable's curve is perpendicular to the existing flat cable's curve on branch point.
- The reference axis for profile orientation is a line perpendicular both to the new curve tangency and to the existing flat cable thickness direction. Therefore, the two cable's profile orientation on this branch point fits.