General Parameters | ||||||||
|
| |||||||
Click Harness Flattening Parameters
 .
.
The Harness Flattening Parameters dialog box opens on the General tab.
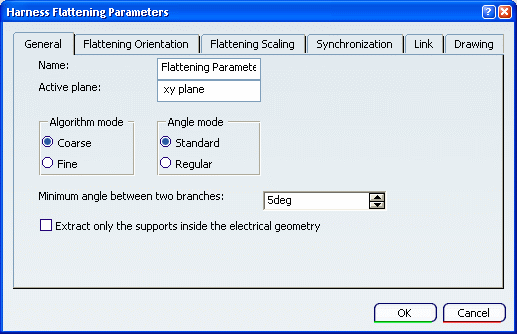
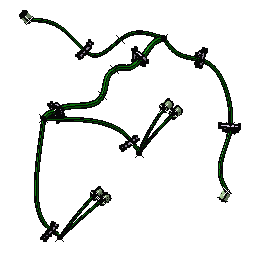
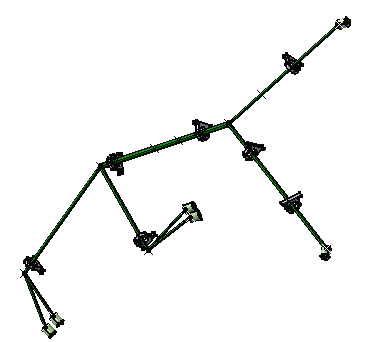
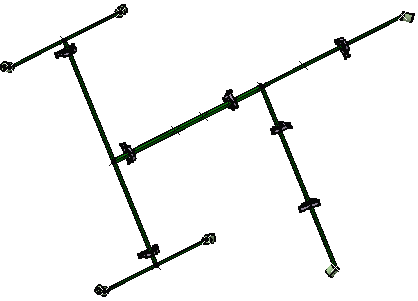
The Algorithm mode has to do with the different ways you can flatten out a segment. The Coarse mode is the default algorithm mode.
- The Coarse mode will roughly straighten the
selected segments, allowing an easy viewing of the segments
you are working on.
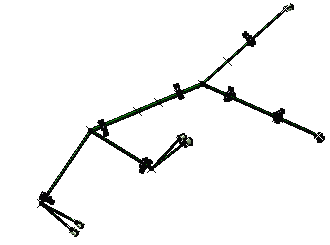
- The Fine mode will
respect the actual shape of the segments as it is in 3D.
- The Coarse mode will roughly straighten the
selected segments, allowing an easy viewing of the segments
you are working on.
Two Angle modes are available. The Standard mode is the default angle mode.
- Choose the Standard mode in order to keep
the actual angles between the segments as in 3D.
- Choose the Regular mode which calculates
regular angles, if you do not care about respecting the
true angle values.
This mode calculates regular angles in predefined target directions depending upon the number of segments and branches.
It is possible to use Flatten Harness branch orientation at junction to better match 3D harness design branch orientation at junction. As an example, let us consider the case of a model consisting of 2 or 3 branches.
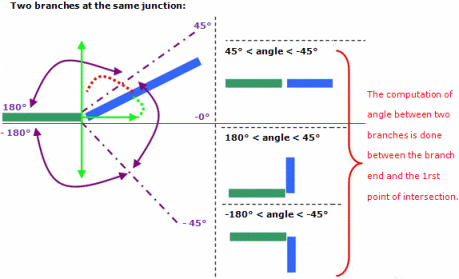
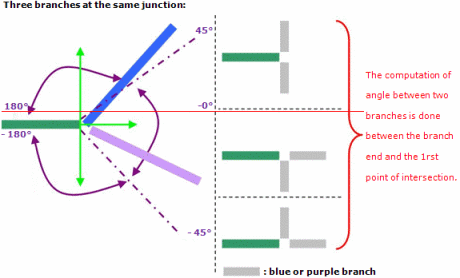
The angle computation between two branches is only applied in Regular mode. The branch direction is calculated with the exact tangency at the branch end (between the branch extremity and the first passing point).
If all the branches' directions in same junction are different, this computed direction is used to fit it as possible as with the Regular angle mode.
If there is at least two segments with the same direction, the algorithm is not launched.
Note that during the process of flattening, if one of the segments being flattened belongs to the same branch as the segment already flattened, then it will be aligned to the already flattened segment.
- Choose the Standard mode in order to keep
the actual angles between the segments as in 3D.
If you want to consider only the supports which belong to the given Electrical Geometry when running the extracting command, select Extract only the supports inside the electrical geometry. The supports which do not belong to the Electrical Geometry will not appear in the extracted data. This option allows you to manage two types of supports:
-
The supports which must be assembled with the geometry during the manufacturing step. This type of support is created inside the Electrical Geometry.
-
The supports which are linked to the structure. These supports are added to the harness during the installation step. This type of support is created outside the Electrical Geometry.
 By default this option is not selected for consistency
with the previous versions.
By default this option is not selected for consistency
with the previous versions.-