Animating Constraints | ||||||
|
| |||||
Select the angle constraint as shown:
Click Animate Constraints
 .
The Animate Constraint dialog box appears. The First
value and Last value fields let you define the maximum
and minimum values for the constraint. The Number of steps
field defines the number of values you wish to assign to the constraint
between the first and last values.
.
The Animate Constraint dialog box appears. The First
value and Last value fields let you define the maximum
and minimum values for the constraint. The Number of steps
field defines the number of values you wish to assign to the constraint
between the first and last values.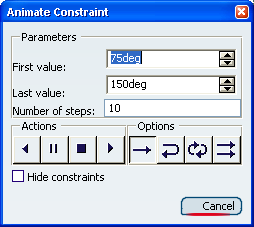
Select Loop

Select Run Animation
 to see how the
sketch is affected by the different values assigned to the constraint.
The command induces a clockwise rotation while moving the rectangle
up and down. These three pictures below give examples of this behavior.
to see how the
sketch is affected by the different values assigned to the constraint.
The command induces a clockwise rotation while moving the rectangle
up and down. These three pictures below give examples of this behavior.
Clear Hide constraints option to display the constraints again. Once the maximum value is reached, that is 260 degrees, the sketch looks like this: