Select (or press CTRL+P).
The type of printer you choose determines the
default settings in the Print dialog box:

Select a printer name.
Select the Print to file check box.
Enter a file name, or click File Name....
In the Print to file dialog box, type the name
of the file in which you will store the image printout.
Click Save.
The file is saved with the .prn extension (the only
extension available).
The information in the file depends on the
printer you selected in the Print dialog box.
When printing to a
3D PLM printer, click Properties....
In the Submission Scripts area, click Custom
next to "Declaration" to specify the default output file name.
Each time you print a document, an output file is created at the
location you specify in the text box.
Click Edit Script... which is now activated.
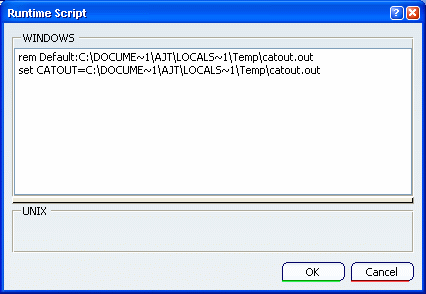
Create your own script.
You can use the following environment variable
contained in the default script:
CATOUT=C:\DOCUME~1\ajt\LOCALS~1\Temp\catout_%CATPRT_DOC_SHEET_NUM%.out
where:
-
C:\DOCUME~1\ajt\LOCALS~1\Temp\
is the location of the document
-
catout_%CATPRT_DOC_SHEET_NUM%.out indicates the
name (stored in catout.out) and number (stored in
%CATPRT_DOC_SHEET_NUM%.out) of the document.
For instance, when using a PostScript printer, you can use this
variable the following way:
set CATOUT=e:\Temp\test_
%CATPRT_DOC_SHEET_NUM%.ps
to specify that the name of the document to be
printed is test.ps and is located in e:\temp.
Click OK to validate your modification in the
script window then OK again to close the Printer
Properties dialog box.
Access the folder in which the file has been saved and use the
Copy
command to print the file.
For example:
copy myfile.prn LPT1 where LPT1
is the local print port.
Optional: If the printer is on a network, use the following command copy myfile.prn \\servername\printername
where servername
is the name of the print server, and printername is the name of the printer.
The file is printed.
