Customizing Buttons Using the 3Dx Device Toolbar | |||||
|
| ||||
Select View > Toolbars > 3DxDevice.

The 3Dx Device toolbar contains native integrated commands which let you modify the mode of the 3Dconnexion® device you are currently using. For detailed information, browse the following Internet site:
http://www.3dconnexion.com
In the 3Dx Device toolbar, click
 .
.
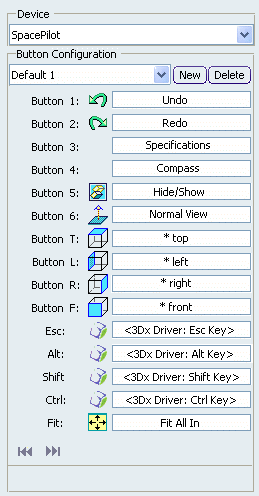
This scenario uses the SpacePilot as an example. The buttons displayed in the dialog box depend on the device you are using.
For instance, when using the SpacePilot PRO, the
 button is available because the buttons available for this device are listed on two pages.
Tip: You can also access the Button Customization dialog box using one of the methods below: - Select Tools > Customize..., click the Commands tab and select VR Button Customization.
- Select View > Commands List... then select VR Button Customization.
- Type c:VR Button Customize or c:3Dx Button Customize in the power input box then press Enter
- Press button "1" of your Space Mouse or Spaceball (if you are using original settings).
In the Button Customization dialog box, use the drop-down list of the Device area to select the device to be used.
In the Button Configuration area, select the default configuration to be used:
- If you are using the SpacePilot and the new driver, you can choose between Default 1 and Default 2 as explained above.
- If you are using the SpacePilot PRO, only one default configuration is available.
- If you are using a SpaceMouse, only one default configuration is available (whatever the driver).
To create a new button configuration, click New:
- With the SpacePilot and the new driver, the configuration is initialized with Default 1.
- With a SpaceMouse, the configuration is initialized with the default configuration.
Each configuration you create is named "Configurationn", "n" is incremented by "1" for each new configuration.
When several configurations have been created, you can switch from one configuration to another using the list.
To delete one of the configurations you created, select it from the list then click Delete.
Note that default configurations cannot be deleted.
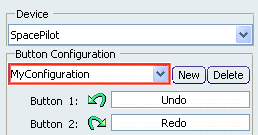
Optional: To rename the configurations (either default or new) displayed in the list, right-click the configuration to be renamed from the list then select Rename.
Optional: In the New title box of the Rename Configuration dialog box, enter the new configuration name before clicking OK to validate.
The new name is then displayed in the Button Configuration list:

Map the desired device button to a particular command or macro using one of the four methods available.
Tip: You can assign the 3Dx Swap view/tree command to one of the buttons of your Space Mouse or Spaceball in order to swap the focus between the specification tree and the geometry. Repeat the previous step as many times as needed to map your device buttons.
Click OK to validate your mapping and close the Button Customization dialog box.
The mapping is saved in the settings, more precisely in a file named VRButtonCustomize.CATSettings.
Press the desired device button to activate the command you assigned to it.
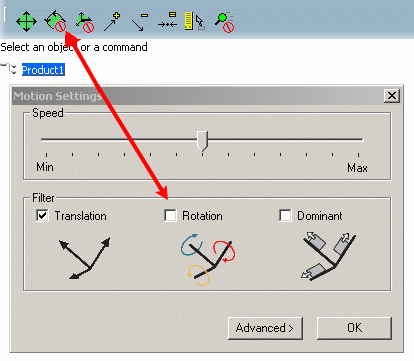
Note that if the Button Customization dialog box is still open, pressing a device button has no effect. From V5R15 onwards, the calibration state is shared by your V6 session and the device driver. Therefore, any change made in V6 (for instance, disabling the rotation) is automatically made in the button function of the device driver and reciprocally:
Access the 3Dxconnexion Control Panel then click the Motion Settings button.
Access your V6 session so that it is displayed in background then, in the Motion Settings dialog box, clear the Rotation check box.
Rotation is instantaneously disabled in V6:

Still in the Motion Settings dialog box, click OK to validate your modification and close the dialog box.
Important: - This applies only to calibration items that can be modified, i.e. Sensitivity, Dominant Mode, Translation On/Off and Rotation On/Off.
- The calibration state is saved in the driver settings. The default calibration calibration can be restored by entering the following command: c:3Dx Sensitivity Reset
To restore the button mappings, click Restore....
Two options are available in the Restore Mappings dialog box:
- Current device lets you restore the original button mapping for the device you are currently using.
- All devices lets you restore the button mapping for all devices to their original commands.
In both cases, if the button mappings have no original settings but only mapped commands or macros, the button drag-and-drop areas will be emptied since mapped commands or macros are not considered as original settings.
Select the appropriate option then click OK.
The 3Dx Device toolbar is customized.
